
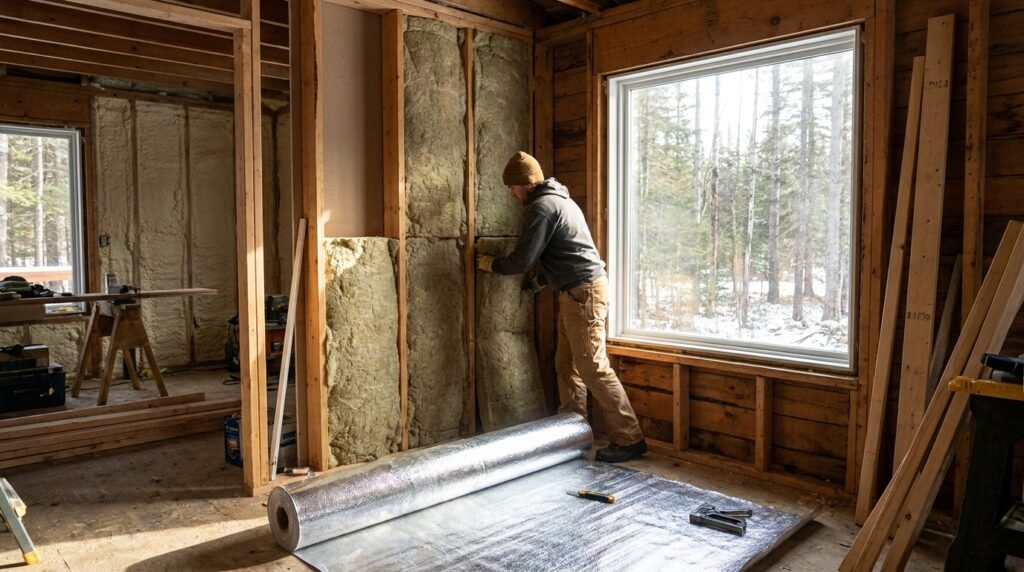
When it comes to making your cabin comfortable and energy-efficient, insulation is key. How to Insulate a Cabin is about creating a barrier that keeps the heat in during winter and out during summer, making your cabin a much more enjoyable place to be year-round. It also helps manage moisture, which is crucial for the longevity of your cabin and the health of its occupants. Think of it as putting on a cozy jacket for your cabin; without it, you’d be battling the elements constantly.
Why Insulation Matters for Your Cabin
Insulating your cabin isn’t just about being toasty in winter or cool in summer, though those are certainly big benefits. It’s about creating a living space that’s efficient, comfortable, and durable. Without proper insulation, you’re essentially throwing money away on heating and cooling, and your cabin is more susceptible to moisture issues, which can lead to costly repairs down the line. A properly insulated cabin can genuinely be lived in year-round, even if it wasn’t originally “specified for winter.”
Energy Savings and Comfort
The most obvious benefit of insulation is its impact on your energy bills. By preventing heat transfer, you reduce the workload on your heating and cooling systems. This translates directly into lower electricity or fuel consumption, which is good for your wallet and the environment. Beyond the financial aspect, insulation makes your cabin feel more comfortable. No more cold areas near the walls or air leaks coming from the floor. The indoor temperature becomes more consistent, creating a much more pleasant living environment. For a cabin you plan to use year-round, this comfort is absolutely essential.
Moisture Control and Structural Integrity
This is often overlooked but incredibly important. Insulation, especially when combined with proper vapor barriers and ventilation, plays a huge role in managing moisture. Without it, warm, moist indoor air can condense on cold surfaces within your walls, roof, or floor. This condensation can lead to mold growth, rot, and even compromise the structural integrity of your cabin over time. As one off-grid cabin builder learned, ventilation and moisture control are critical, with attic insulation baffles being a recommended way to help condensation dissipate. Addressing the roof and floor insulation first, along with vapor control and draft-proofing, is often cited as the best approach for year-round comfort.
Sound Dampening
While not its primary purpose, insulation can also help reduce noise transfer. If your cabin is in a noisy area, or you simply prefer a quieter indoor environment, dense insulation materials can help absorb sound waves, making your cabin a more peaceful retreat.
For those interested in enhancing their cabin’s energy efficiency, our Cabin Insulation Guide is an essential resource. To further complement your off-grid living experience, you might find our related article on setting up a tiny house off-grid particularly useful. This guide covers critical aspects such as power, water, and waste management, ensuring a comprehensive understanding of sustainable living. You can read more about it here: Tiny House Off-Grid Setup Guide.
Essential Areas to Insulate in a Cabin
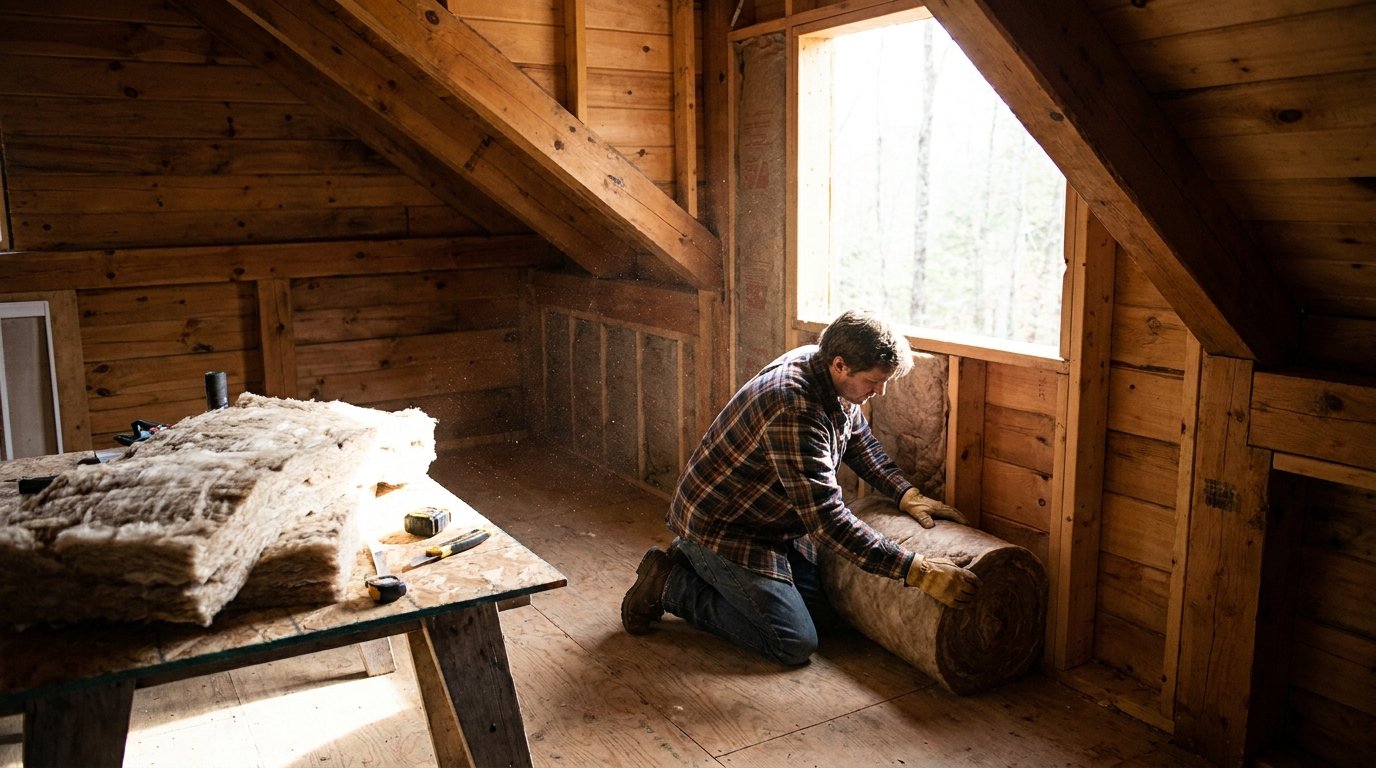
When it comes to insulating your cabin, you’ll want to focus on the main culprits for heat loss and gain: the roof, walls, and floor. These are the areas where the most significant thermal transfer occurs, and addressing them properly will give you the best return on your insulation investment.
Roof and Ceiling Insulation
The roof is arguably the most critical area to insulate. Heat rises, so a poorly insulated roof acts like an open chimney, letting all your warmth escape in winter. In summer, the sun beating down on the roof can turn your cabin into an oven. Therefore, roof insulation should be a top priority for year-round comfort.
Types of Roof Insulation
- Batt and Roll Insulation (Fiberglass, Mineral Wool): These are common and relatively inexpensive. They fit between joists or rafters. However, you need to ensure the correct size; one builder had to swap plans because R19 batts didn’t fit 16-inch-on-center rafters, highlighting the importance of checking dimensions. When installing, always leave an air gap (baffle) between the insulation and the roof sheathing for ventilation to prevent moisture buildup.
- Rigid Foam Boards (XPS, EPS, Polyiso): These offer higher R-values per inch than batts and are excellent for insulating under the roof deck or over existing sheathing. They also act as a vapor barrier if seams are properly taped.
- Spray Foam (Open-cell, Closed-cell): This is a highly effective option that creates an airtight seal, eliminating drafts and providing excellent thermal performance. Closed-cell spray foam will also acts as a good vapor barrier. It’s generally more expensive and requires professional installation, but the benefits in terms of air sealing and R-value are significant.
- Loose-fill/Blown-in Insulation (Cellulose, Fiberglass): Ideal for attics, this insulation is blown into cavities, conforming to irregular spaces and providing good coverage. It’s great for adding extra R-value to existing attics.
Ventilation for Roofs
Just as important as the insulation itself is proper ventilation. Without it, moisture can get trapped, leading to mold and rot. This is where those attic insulation baffles come in – they create a channel for air to move from the soffit vents up to the ridge vent, allowing any condensation to dissipate. Adequate airflow is crucial for the health of your roof and the effectiveness of your insulation.
Wall Insulation
The walls of your cabin are another major surface area for heat transfer. Properly insulating them will significantly minimize heat loss during winter and heat gain during summer. The “wall thickness” is explicitly mentioned as a factor for year-round living, suggesting that a thicker, better-insulated wall is more comfortable.
Options for Wall Insulation
- Batt and Roll Insulation: Similar to roofs, fiberglass or mineral wool batts are commonly used in wall cavities. Again, measure your stud spacing accurately (e.g., 16 or 24 inches on center) to ensure a snug fit.
- Rigid Foam Boards: Can be used on the exterior of the wall framing (under siding) or on the interior (under drywall). This provides continuous insulation, reducing thermal bridging through the studs.
- Spray Foam: Excellent for walls as it seals all the nooks and crannies, providing a superior air barrier and high R-value. It’s particularly useful in log cabins or cabins with irregular wall structures where batts might not fit perfectly.
- Dense-pack Cellulose: Blown into closed wall cavities, it fills every void and offers good R-value and sound dampening.
Dealing with Thermal Bridging
One challenge with wall insulation is “thermal bridging,” where heat can still escape through the studs themselves, as wood is a conductor (though not as good as metal). Using continuous insulation (like rigid foam on the exterior) can help mitigate this.
Floor Insulation
Don’t neglect the floor! Cold floors are incredibly uncomfortable and a significant source of heat loss, especially if your cabin is built on piers, a crawl space, or an unheated basement. For year-round comfort, floor insulation is just as important as roof insulation.
Insulating Under the Floor
- Batt Insulation: Fiberglass or mineral wool batts can be installed between floor joists. You’ll need some method to hold them in place, such as wire supports or netting. Ensure a vapor barrier is on the warm side of the insulation, usually facing upwards towards the living space.
- Rigid Foam Boards: Cut to fit snugly between joists, or applied as a continuous layer underneath the subfloor. This provides a good thermal break and can also help with air sealing.
- Spray Foam: Applied to the underside of the subfloor and between joists, spray foam creates an excellent air seal and high R-value, effectively sealing off the living space from the cold ground or crawl space air.
- Skirting and Crawl Space Encapsulation: If your cabin has a crawl space, insulating the floor is only half the battle. Encapsulating the crawl space (sealing it off from the outside air, insulating the walls of the crawl space, and adding a vapor barrier on the ground) can dramatically improve floor temperatures and prevent moisture issues.
Understanding R-Value and Material Choices

Choosing the right insulation involves understanding R-value, which is essentially the insulation’s ability to resist heat flow. A higher R-value means better insulating performance. The Department of Energy (DOE) provides R-value recommendations based on climate zones, so it’s always a good idea to check those for your specific location. However, R-value isn’t the only factor; the type of material, its cost, ease of installation, and how it handles moisture are also critical considerations.
R-Value Explained
The “R” in R-value stands for “resistance” to heat flow. The higher the number, the more effective the insulation. For example, R-30 insulation is twice as effective as R-15. These values are cumulative, meaning if you layer two R-10 batts, you get an R-20 wall. General insulation resources from the Insulation Institute continue to provide installation guidance and DOE R-value recommendations, which are excellent starting points. “New insulation guides for contractors and building professionals have been released by NAIMA” which can offer more detailed, current information.
Common Insulation Materials
There’s a variety of materials out there, each with its own pros and cons.
Fiberglass and Mineral Wool Batts
- Pros: Widely available, relatively inexpensive, DIY-friendly, good fire resistance (mineral wool).
- Cons: Can be itchy to handle, requires careful cutting and fitting to avoid gaps, R-value can be compromised if compressed, not a good air barrier on its own.
- Typical R-value: R-3 to R-4 per inch.
Rigid Foam Boards (XPS, EPS, Polyiso)
- Pros: High R-value per inch, resistant to moisture (XPS, EPS), can act as an air barrier if seams are taped, lightweight, easy to cut.
- Cons: More expensive than batts, some types (Polyiso) lose R-value in very cold temperatures, can be rigid to work around curves.
- Typical R-value: R-3.8 to R-6.5 per inch.
Spray Foam (Open-cell, Closed-cell)
- Pros: Excellent air sealing, high R-value, fills irregular cavities, good sound dampening. Closed-cell is also a vapor barrier and adds structural rigidity.
- Cons: More expensive, requires professional installation and specialized equipment, open-cell is not a vapor barrier and can absorb water.
- Typical R-value: Open-cell R-3.5 to R-4.5 per inch; Closed-cell R-6 to R-7 per inch.
Loose-fill/Blown-in (Cellulose, Fiberglass)
- Pros: Conforms to irregular spaces, good for retrofitting attics and walls, often made from recycled materials (cellulose), good sound dampening.
- Cons: Can settle over time (especially cellulose), requires special blowing equipment, not a structural material.
- Typical R-value: R-3 to R-4 per inch.
Sizing and Compatibility
As noted in a recent off-grid cabin project, an R19 batt didn’t fit 16-inch-on-center rafters. This highlights a crucial point: always check your framing dimensions before buying materials. Insulation comes in standard widths (15 inches for 16-inch-on-center framing, 23 inches for 24-inch-on-center framing), and if it’s too wide, it will compress, reducing its R-value. If it’s too narrow, it leaves gaps. Measure twice, buy once.
Crucial Considerations Beyond R-Value
Insulation isn’t a standalone component; it’s part of a larger system that includes air sealing, vapor control, and ventilation. Neglecting these aspects can undermine even the best insulation efforts, leading to problems like moisture damage and reduced efficiency.
Air Sealing is Paramount
Even the highest R-value insulation won’t perform well if air can freely move through gaps and cracks in your cabin’s envelope. Air sealing is often described as more important than insulation itself, as it prevents drafts and uncontrolled air leakage. This means:
- Caulking and weatherstripping: Seal around windows, doors, and any penetrations for wires or pipes.
- Foam sealants: Use expanding foam for larger gaps around rough openings for windows and doors, or where different building materials meet.
- Gaskets: For electrical boxes and outlets on exterior walls.
- Sealing penetrations: Ensure that any pipes, wires, or vents that pass through the walls, roof, or floor are properly sealed.
A significant amount of heat loss occurs through air leakage, not just conduction through walls. So, tackle air sealing before or in conjunction with insulation.
Vapor Barriers and Moisture Management
Warm, moist air from inside your cabin can travel through walls, ceilings, and floors and condense when it hits a cold surface (the “dew point”). This condensation can lead to mold, rot, and diminished insulation performance. A vapor barrier (or vapor retarder) is a material designed to resist the diffusion of water vapor.
- Placement: Generally, the vapor barrier should be placed on the “warm in winter” side of the insulation. In most cold climates, this means on the interior side of the wall, floor, or ceiling assembly. However, specific recommendations can vary based on climate and construction type, so it’s always good to check local building codes or consult an expert.
- Materials: Polyethylene sheeting, foil-faced insulation, or certain paints can act as vapor barriers. Some insulation materials (like closed-cell spray foam) are inherently vapor barriers.
- Balance: It’s a delicate balance. Too tight a vapor barrier in the wrong place can trap moisture. The goal is to control vapor, not necessarily create an impermeable seal everywhere.
Ventilation, Especially for Roofs
As mentioned earlier, ventilation is critical, especially for roof assemblies. An unventilated attic or roof space can accumulate moisture, leading to problems.
- Soffit and Ridge Vents: These work together to create a continuous airflow path, allowing moist air to escape. Insulation baffles are essential to maintain this air channel above the insulation in sloped roofs.
- Crawl Space Ventilation: If your cabin has a vented crawl space, ensure the vents are clear and properly screened. However, for maximum energy efficiency and moisture control, an encapsulated (sealed and insulated) crawl space is often preferred over a vented one.
- Interior Ventilation: Don’t forget about exhaust fans in bathrooms and kitchens. These remove moisture at its source, preventing it from migrating into your cabin’s structure.
For those looking to enhance their off-grid living experience, understanding the intricacies of cabin insulation is crucial. A well-insulated cabin not only maintains a comfortable temperature but also contributes to energy efficiency. To further explore the essential components of off-grid systems, you might find it beneficial to read about the various aspects of power, water, and waste management in this informative article on off-grid systems. This resource complements your knowledge of cabin insulation by providing insights into how these systems work together to create a sustainable living environment.
Planning Your Cabin Insulation Project
| Insulation Type | R-Value per Inch | Recommended Thickness (inches) | Best Use | Moisture Resistance | Cost Efficiency |
|---|---|---|---|---|---|
| Fiberglass Batts | 3.1 – 3.4 | 6 – 12 | Walls, Ceilings | Moderate | High |
| Spray Foam (Closed Cell) | 6.0 – 7.0 | 3 – 6 | Walls, Roofs, Floors | Excellent | Moderate |
| Spray Foam (Open Cell) | 3.5 – 3.6 | 6 – 12 | Interior Walls | Low | Moderate |
| Rigid Foam Board | 4.0 – 6.5 | 2 – 4 | Exterior Walls, Roofs | High | Moderate |
| Cellulose | 3.2 – 3.8 | 8 – 12 | Attics, Walls | Moderate | High |
| Mineral Wool | 3.0 – 3.3 | 6 – 12 | Fire Resistant Areas | High | Moderate |
Before you dive into buying materials and tearing things apart, a little planning goes a long way. This includes assessing your current situation, setting a realistic budget, and understanding the project’s scope.
Assessing Your Current Cabin
Start by walking through your cabin, top to bottom.
- Identify Problem Areas: Feel for drafts around windows, doors, and outlets. Check for cold spots on walls or floors. Look for signs of moisture, like water stains or mold.
- Existing Insulation: If you have existing insulation, try to determine its type and condition. Is it compressed? Does it look old or damaged? Is there evidence of pests?
- Framing Dimensions: Crucially, measure the spacing of your wall studs, roof rafters, and floor joists (typically 16 or 24 inches on center). This will directly impact the size of batt insulation you can use. Remember the lesson from the off-grid builder who had to swap plans because R19 batts didn’t fit!
- Access: Consider how you’ll access the areas you need to insulate – is the attic walkable? Is the crawl space high enough?
Budgeting and Cost Considerations
Insulation can be a significant investment, but it’s one that typically pays for itself over time through energy savings.
- Material Costs: These vary widely by type (batts are cheaper than spray foam), R-value, and quantity.
- Labor Costs: If you’re hiring professionals, labor will be a substantial part of the cost, especially for spray foam or dense-pack cellulose. DIY can save money on labor but requires your time and potentially renting specialized equipment.
- Tools and Equipment: Factor in costs for safety gear (gloves, masks, eye protection), utility knives, caulk guns, and potentially blowers for loose-fill insulation.
- Disposal: If you’re removing old insulation, consider disposal costs.
- Tax Credits (Past Consideration): While the U.S. residential insulation tax credit expired on Dec. 31, 2025, it’s always worth checking for any new or local incentives that might arise. This highlights how the cost picture for DIY projects can change, so always look for current information.
DIY vs. Professional Installation
Deciding whether to do it yourself or hire a pro depends on several factors:
- Complexity of the Job: Installing batts in an open attic is generally DIY-friendly. Spray foam, dense-pack cellulose in walls, or complex retrofits are usually best left to professionals.
- Skill Level and Time: Do you have the necessary skills, tools, and time? Insulation work can be physically demanding and messy.
- Safety: Some insulation materials require specific safety precautions (e.g., respirators for spray foam or old fiberglass).
- Guarantees: Professionals typically offer warranties on their work.
Ultimately, proper cabin insulation is an investment in comfort, efficiency, and the longevity of your cabin. By addressing the roof, walls, and floor, paying attention to air sealing and moisture control, and choosing the right materials, you can transform your cabin into a truly comfortable year-round retreat.
FAQs
What are the benefits of insulating a cabin?
Insulating a cabin helps regulate the temperature inside, making it more comfortable during both hot summers and cold winters. It also helps reduce energy costs by improving the cabin’s energy efficiency.
What are the different types of insulation materials suitable for cabins?
Common insulation materials for cabins include fiberglass, foam board, spray foam, and natural materials like wool or cotton. Each material has its own pros and cons, so it’s important to choose the one that best suits your needs.
How can I determine the right amount of insulation needed for my cabin?
The amount of insulation needed for a cabin depends on factors such as the climate, cabin size, and desired energy efficiency. Consulting with a professional or using an insulation calculator can help determine the appropriate amount for your specific situation.
Are there any special considerations for insulating a cabin in a remote location?
When insulating a cabin in a remote location, it’s important to consider factors like accessibility of materials, local climate conditions, and the potential for wildlife intrusion. Using durable and weather-resistant insulation materials is recommended.
Can I install cabin insulation myself, or should I hire a professional?
While some cabin owners may choose to install insulation themselves, hiring a professional can ensure proper installation and optimal energy efficiency. A professional can also provide guidance on the best insulation materials for your specific cabin and climate.