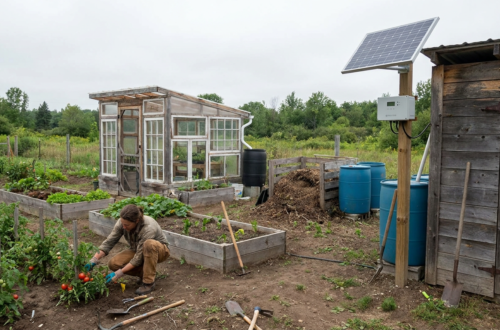
So, you’re looking for a way to store your harvest without a traditional root cellar? Good news: you don’t actually need a fancy, purpose-built structure to keep your produce fresh for months. There are plenty of practical, everyday root cellar alternatives that can achieve similar results, often with things you already have or can easily acquire. The key is understanding what makes a root cellar work – cool, consistent temperatures, high humidity, and darkness – and then finding ways to replicate those conditions. Think creatively, and you’ll find a solution that fits your space and budget.
One of the most effective ways to mimic a root cellar is to tap into the earth’s natural insulation. Below the frost line, soil temperatures remain remarkably stable, providing that consistent cool environment your produce craves. This method is incredibly low-tech and can be surprisingly effective for root crops and other hardy vegetables.
Table of Contents
Re purposing Old Appliances
Let’s face it, old refrigerators and freezers often end up as junk. But before you haul that broken-down appliance to the dump, consider its potential as an underground storage unit.
Why an old fridge or freezer?
These appliances are already insulated and have a sturdy, enclosed structure. When buried, they create a fantastic microclimate for your stored goods. The insulation helps maintain a steady temperature, while the sealed nature of the unit protects against pests and moisture fluctuations. It’s essentially a pre-made, weatherproof root cellar you just need to put in the ground.
How to bury it effectively
First, ensure the appliance is completely clean and empty – no lingering food smells or mildew. You’ll want to remove the door latch for safety, especially if children or animals could be around. Dig a hole slightly larger than the appliance in a well-drained area. Placing a layer of gravel at the bottom can help with drainage. Position the opening so it’s accessible but still protected from direct sunlight and rain. You can even build a small, insulated ‘hatch’ above ground to cover the opening and provide additional insulation. Backfill around the unit with soil, ensuring it’s stable. For added humidity, you can place a layer of straw or sand inside the appliance before storing your produce.
Trash Cans, Barrels, and Buckets: Smaller, Scalable Options
If burying a whole refrigerator seems like too big a project, or if you only have a smaller harvest, scaled-down buried containers are a great option.
The benefits of smaller containers
These are much easier to handle and can be placed in various spots around your yard. They’re also less of a commitment if you’re just experimenting with underground storage. You can have multiple smaller caches for different types of produce, allowing you to manage specific humidity and temperature needs if required.
Choosing the right container and burial method
Opt for heavy-duty plastic or metal trash cans, food-grade barrels, or large buckets with tight-fitting lids. Metal can rust, so consider lining it or painting it with rust-proof paint. As with the refrigerator, dig a hole below the frost line in a well-drained spot. Line the bottom of your chosen container with a few inches of straw, sand, or sawdust. This provides cushioning, helps absorb excess moisture, and adds a layer of insulation. Layer your produce, ensuring items aren’t touching the sides of the container directly. For extremely dry climates, you might even consider adding a small, open container of water inside to increase humidity. Secure the lid tightly and then bury the container, leaving a small portion of the lid accessible or marking its location clearly. You can even create a small mound of soil over the top for extra insulation and to prevent water pooling.
For those interested in exploring various methods of food preservation, the article on off-grid living provides valuable insights. It discusses not only root cellar alternatives but also offers a comprehensive overview of sustainable practices for beginners. You can read more about these essential strategies for maintaining food supplies in challenging environments by visiting this link: Off-Grid Living for Beginners: Simple Guide.
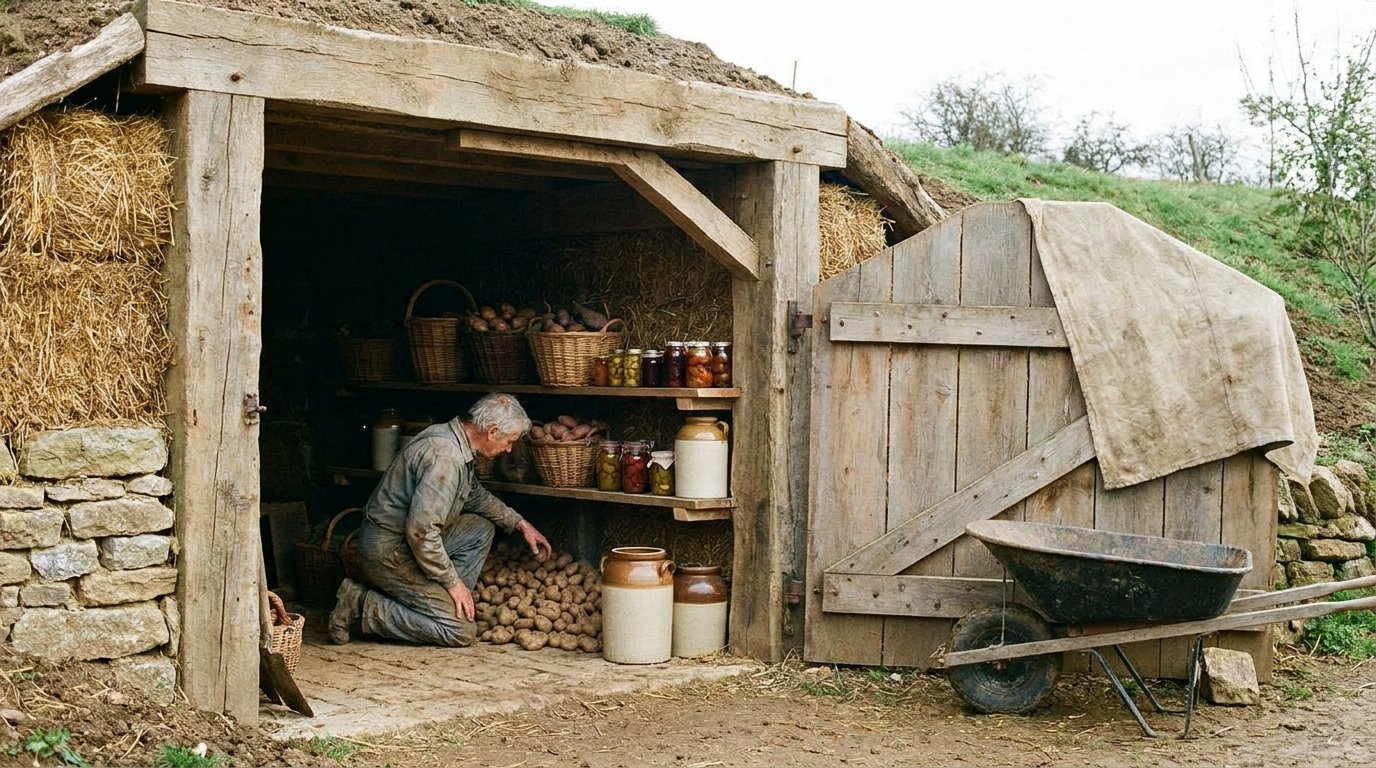
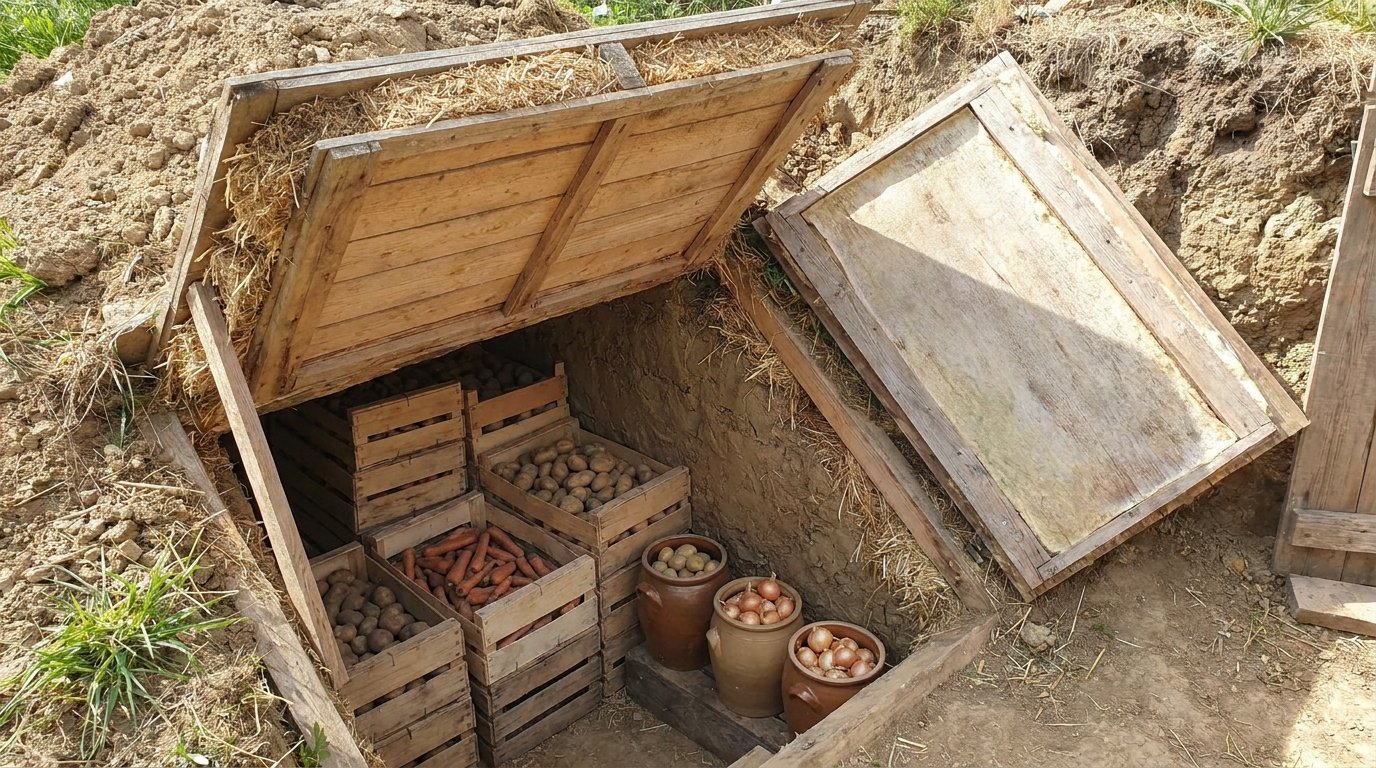
Above Ground, Below Frost: Clamp Storage
This method is less about burying a container and more about creating an insulated mound right where your produce is stored. It’s an ancient technique, essentially a temporary, natural root cellar.
Understanding Clamp Storage
Clamp storage involves digging a shallow trench or pit, layering your produce (typically root vegetables like carrots, potatoes, and beets) with insulating materials like straw, and then covering the entire heap with soil. The key is to get below the initial frost and then rely on the insulating layers to protect your harvest from deeper freezes.
Step-by-Step Clamp Construction
Finding the right spot
Choose a well-drained, slightly elevated spot to prevent water accumulation. Protection from direct sunlight and strong winds is also a plus. Southern-facing slopes can sometimes be warmer, but you want consistent coolness, so an area that stays shaded might be better.
The layering process
- Excavate: Dig a shallow depression or trench, perhaps 6-12 inches deep, in your chosen spot. This gets your produce a bit below the surface.
- Base Layer: Lay down a thick layer (6-12 inches) of straw, hay, or even dry leaves directly in the pit. This insulates from the ground.
- Produce Layer: Carefully place your cleaned (but not washed) root vegetables on top of the straw. Don’t pile them too high, a single layer or two is often best to ensure proper air circulation. Don’t let them touch each other if possible – this helps prevent spoilage from one item spreading to another.
- Insulation Layer: Cover the produce with another thick layer of straw (at least 12-18 inches).
- Soil Cover: Now, gently mound soil over the straw. Start with a few inches, making sure to completely cover all the straw. As temperatures drop, you can add more soil, eventually creating a mound that’s 1-2 feet high. This creates the final insulating barrier.
- Optional Top Cover: For added protection from rain and to help shed water, you can place a piece of plastic sheeting or even old wooden boards over the top of the soil mound. Just make sure there’s enough space for some air to circulate, preventing condensation buildup.
Accessing your produce
When you need to retrieve items, carefully uncover a portion of the clamp, take what you need, and then re-cover it completely, ensuring all layers are put back in place to maintain insulation.
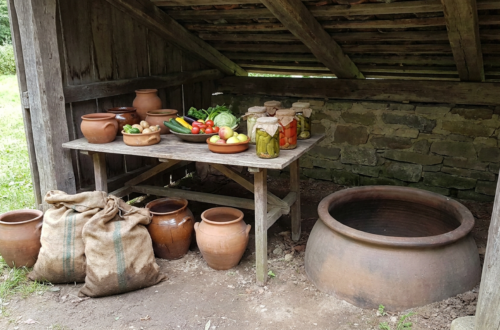
Harnessing Natural Water: The Springhouse Advantage
If you happen to be lucky enough to have a natural spring or a consistent flow of cool water on your property, a springhouse is an invaluable root cellar alternative that uses nature to its full potential.
What is a Springhouse?
Historically, a springhouse is a small, unheated building constructed directly over a natural spring or cool water source. The constant flow of cool water helps maintain a steady, low temperature inside the structure, often accompanied by high humidity. It’s essentially a natural refrigeration system.
Building or Utilizing a Springhouse
The core principles
The design focuses on maximizing the cooling effect of the water. This usually means having the spring water flow through a channel or basin within the small building. Shelves or containers for produce are then placed in close proximity to or even directly in the cool water, though usually with a barrier to prevent direct contact that could lead to spoilage.
Ideal conditions from a springhouse
The key benefits are the incredibly stable temperature and humidity levels that are naturally created. The constant movement of water prevents temperature fluctuations, while evaporation from the water surface keeps the air moist, perfect for many root crops that shrivel in dry conditions. If you have such a natural resource, investigating how to build or convert a small structure into a springhouse could be a fantastic long-term storage solution. Even without an elaborate structure, a simple enclosed space near a cool spring can offer some of these benefits.
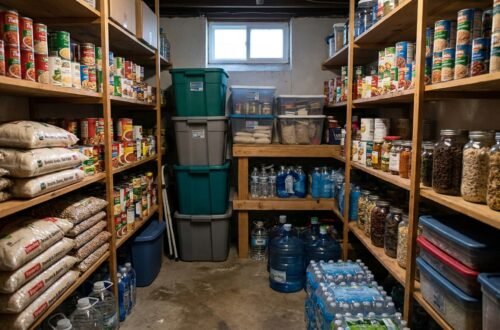
Inside the Home: Untapped Potential for Storage
You don’t always need to go outside or dig deep to find root cellar-like conditions. Many homes have forgotten corners that can be repurposed for effective food storage. The goal here is to find the coolest, darkest, and most humid spot available.
Unheated Spaces: Garages, Basements, and Sheds
These areas are often overlooked but can provide surprisingly good conditions, especially during cooler months.
The characteristics to look for
- Coolness: The primary goal. Unheated spaces will naturally be cooler than your living areas. Look for northern-facing walls or areas that don’t get direct sunlight.
- Darkness: Light can degrade certain nutrients and encourage sprouting. Keep stored produce in dark conditions.
- Breathability: Good air circulation is important to prevent mold and rot. Avoid air-tight containers unless specifically advised for a particular item.
- Humidity: This is often the trickiest part indoors. Basements tend to have higher humidity. Garages and sheds can be dry, requiring some creative solutions (see below).
Adapting the space for storage
- Basements: The classic indoor choice. Look for corners furthest from the furnace or water heater. Store items in wooden crates, mesh bags, or perforated plastic bins. You might need to increase humidity for some items by leaving an open container of water in the corner.
- Garages: If your garage is unheated and doesn’t get too hot or cold, it can work. Avoid storing directly on concrete, which can draw moisture and cold. Use pallets, shelves, or inverted crates to keep items off the floor. Watch out for fumes from cars or chemicals.
- Sheds: Similar to garages, but often less insulated. This means wider temperature swings. It might be better for shorter-term storage or in very mild climates. Ensure it’s pest-proof.
- Closets: An unused closet in an unheated room or against an exterior (preferably north-facing) wall can be surprisingly cool and dark. Again, use breathable containers.
Managing humidity in drier spaces
If your chosen indoor spot is too dry (which is common in heated homes or dry sheds/garages), your produce will shrivel. You can increase humidity by:
- Damp sand/sawdust: Layering root crops in slightly damp (not wet) sand, sawdust, or peat moss in bins or boxes.
- Open water containers: Placing a bucket or tray of water in the storage area. Evaporation will add moisture to the air.
- Misting: Periodically misting the air (not directly onto the produce if it encourages rot) around the storage area.
Controlled Storage with Appliances: The Modern Solution
For those who want more precision and have a spare appliance, creating a dedicated cold storage unit offers excellent control.
The controlled fridge or freezer setup
This involves using a spare refrigerator or chest freezer and pairing it with an external temperature controller. These controllers plug into the wall outlet, and your appliance plugs into the controller. A temperature probe is placed inside the appliance, allowing you to set a precise temperature (e.g., 35-45°F or 2-7°C) that’s ideal for root cellar conditions, rather than the colder freezer or standard fridge temperatures.
Benefits and considerations
- Precision: You get exact temperature control, which is the biggest advantage over passive methods.
- Pest-proof: Appliances are sealed, keeping out rodents and insects.
- Humidity control: While a fridge/freezer will maintain a specific temp, humidity can be an issue. For fridges, the “crisper drawer” is designed for higher humidity. For freezers, you can place open containers of slightly damp sand or even a small cup of water at the bottom to increase ambient humidity for certain crops.
- Cost: This requires an initial investment in the appliance and controller, plus the ongoing electricity cost. However, a chest freezer converted to a fridge by a temperature controller uses significantly less energy than a traditional refrigerator, as freezers are designed for much lower temperatures and have thicker insulation.
- Mobility: Unlike a buried solution, you can move this setup if needed.
If you’re exploring various methods for preserving your food, you might find it helpful to read about essential off-grid living tips in this informative article. It discusses practical solutions for beginners, including alternatives to traditional root cellars that can enhance your food storage capabilities. For more insights, check out the article on off-grid living FAQs, which covers a range of topics that can help you adapt to a self-sufficient lifestyle.
Leaving it in the Ground: Nature’s Own Storage
| Alternative | Pros | Cons |
|---|---|---|
| Refrigeration | Keeps food fresh for a longer time | Requires electricity |
| Canning | Prolongs shelf life of food | Time-consuming process |
| Freezing | Preserves food quality | Dependent on electricity |
| Dehydration | Reduces food weight and volume | Can alter taste and texture |
For certain hardy crops, the best “root cellar” is actually the ground they grew in. This method saves you the effort of harvesting and re-storing, letting nature do most of the work.
Which crops thrive with in-ground storage?
This method is primarily suited for root vegetables that can tolerate frost and don’t rapidly spoil in moist soil. Good candidates include:
- Carrots
- Parsnips
- Beets
- Potatoes (in some climates)
- Salsify
- Scorzonera
- Some leeks
- Hearty greens like kale and collards (though not strictly “root crops,” they tolerate cold well in the ground)
The key to successful in-ground storage: Mulch
Mulch is your best friend here. It acts as an insulating blanket, preventing the ground from freezing too deeply and allowing you to harvest even through winter snow.
Applying mulch for insulation
- Timing: Apply mulch generously before the ground freezes hard.
- Material: Use a thick layer (6-12 inches, or even more in very cold climates) of straw, hay, dry leaves, wood chips, or even an old carpet.
- Coverage: Extend the mulch a foot or two beyond the crop rows to ensure wide insulation.
- Securing: In windy areas, you might need to place a few branches or planks on top of the mulch to prevent it from blowing away.
Harvesting from the ground
When you want to harvest, simply pull back the mulch from a section, dig up what you need, and then replace the mulch. The ground beneath should be soft enough to dig through, even if the surrounding soil is frozen solid. This method allows you to enjoy fresh, crisp vegetables throughout the colder months, often tasting sweeter after a light frost.
For those exploring options for food storage beyond traditional root cellars, there are various innovative methods that can be employed to keep produce fresh for longer periods. One interesting resource that delves into the broader implications of sustainable living is an article discussing the costs associated with going off-grid. This piece provides valuable insights into how food storage solutions fit into a larger off-grid lifestyle. You can read more about it in this informative article on going off-grid.
Considerations for All Alternatives
No matter which root cellar alternative you choose, there are a few universal principles that will increase your success rate and keep your produce fresh longer.
Preparing Your Produce for Storage
The way you handle your harvest before storage is critical.
Proper harvesting and curing
- Harvest at peak maturity: Don’t harvest too early or too late.
- Gentle handling: Avoid bruising or cutting your produce, as these are entry points for rot.
- Cleaning, not washing: For most root crops, simply brush off excess dirt. Washing can introduce moisture and break down the protective skin, leading to quicker spoilage.
- Curing: Some vegetables, like potatoes, sweet potatoes, and winter squash, benefit from a “curing” period. This involves storing them for a week or two in a warm, humid environment immediately after harvest. This allows cuts to heal and skins to toughen, significantly improving their storage life.
The Importance of Air Circulation and Separation
Good airflow prevents moisture buildup and the spread of mold and rot.
Preventing spoilage and promoting longevity
- Breathable containers: Always use wooden crates, mesh bags, burlap sacks, or perforated plastic bins. Avoid sealed plastic bags or containers unless specifically recommended for a very short storage period.
- Spacing: If possible, try not to let individual items touch each other. This prevents rot from spreading if one item goes bad. Layering with sand, straw, or sawdust helps achieve this.
- Regular checks: Inspect your stored produce periodically. Remove any items showing signs of rot immediately to prevent it from spreading to healthy produce.
Pest Management
Critters love a free meal as much as we do.
Keeping pests at bay
- Physical barriers: For buried scenarios, ensure lids are tight-fitting and buried containers are sturdy. For above-ground storage, ensure your sheds, garages, or indoor spaces are sealed against rodents and insects. Wire mesh can protect vents or openings.
- Cleanliness: Keep your storage area clean and organized. Spilled food or rotting items attract pests.
- Natural deterrents: While not foolproof, some people use peppermint oil or bay leaves as natural deterrents, but physical barriers are always more reliable.
By understanding the principles behind a good root cellar and applying these practical alternatives, you can significantly extend the life of your harvest, reduce food waste, and enjoy homegrown produce long after the growing season has ended. Experiment with different methods to find what works best for your specific climate, crops, and personal resources. Happy storing!
FAQs
What are root cellar alternatives for food storage?
Root cellar alternatives for food storage are alternative methods for storing food that mimic the cool, dark, and humid conditions of a traditional root cellar. These alternatives can include using a basement, a cool pantry, a refrigerator, a freezer, or even outdoor storage methods like burying food in the ground or using a cool, shaded outdoor structure.
How can a basement be used as a root cellar alternative?
A basement can be used as a root cellar alternative by utilizing its naturally cool and dark environment. By organizing and storing food properly in the basement, such as in shelves or bins, and controlling the humidity levels, it can effectively serve as a substitute for a traditional root cellar.
What are some tips for using a cool pantry as a root cellar alternative?
To use a cool pantry as a root cellar alternative, it’s important to keep the pantry well-organized and free of pests. Additionally, maintaining a consistent cool temperature and proper ventilation will help preserve the quality of the stored food. Using shelves, bins, and containers to store food can also help maximize space and keep the pantry organized.
How can outdoor storage methods be used as root cellar alternatives?
Outdoor storage methods, such as burying food in the ground or using a cool, shaded outdoor structure, can be used as root cellar alternatives by taking advantage of the naturally cool and humid conditions. Burying food in the ground in a designated area or using a well-ventilated outdoor structure can help protect the food from temperature fluctuations and sunlight exposure.
What are the benefits of using root cellar alternatives for food storage?
The benefits of using root cellar alternatives for food storage include extending the shelf life of perishable foods, reducing food waste, and providing a cost-effective and sustainable way to store food. These alternatives also allow for greater self-sufficiency and can help individuals and families maintain a supply of fresh, homegrown, or locally sourced produce throughout the year.