So, you’re thinking about going with off-grid solar? That’s fantastic! The very first question that pops up for most people is, “How big does my solar system actually need to be?” Getting the size right is crucial. Too small, and you’ll be constantly running out of power; too large, and you’ve spent money you didn’t need to. In a nutshell, sizing an off-grid solar system boils down to figuring out how much energy you use, how much sun you get, and how long you want to store that energy for. We’re going to walk through this step-by-step, making it as straightforward as possible.
This is where it all begins. You can’t build a house without knowing how many rooms you need, and you can’t build a solar system without knowing how much power you’ll consume. This isn’t just about big appliances; it’s about everything that plugs in.
Table of Contents
1a. The Appliance Audit: What Do You Use?
Grab a pen and paper, or open a spreadsheet. Walk around your home and list every single electrical device you plan to use with your off-grid system. Don’t forget the small stuff – phone chargers, electric toothbrushes, LED string lights.
- Categorize: Group similar items (e.g., all lights, all kitchen appliances).
- Identify Wattage: Look for a label on each device. It usually states “Watts” (W) or “Amps” (A) and “Volts” (V). If you only find Amps and Volts, multiply them together (A x V = W). If you can’t find anything, a quick online search for “[appliance name] wattage” will usually give you a good estimate.
- Consider Usage Time: This is key. A 1000W microwave might seem like a lot, but if you only use it for 5 minutes a day, its overall energy contribution is quite small. A 10W LED light left on for 10 hours a day will consume more energy in total. Estimate how many hours per day you’ll use each item.
1b. Calculating Daily Watt-Hours (Wh)
Now for the math. For each appliance, multiply its wattage by the number of hours you use it per day. This gives you its daily watt-hours (Wh).
- Example 1: LED Bulb
- Wattage: 10W
- Hours Used Per Day: 6 hours
- Daily Wh: 10W * 6h = 60 Wh
- Example 2: Laptop Charger
- Wattage: 60W
- Hours Used Per Day: 4 hours
- Daily Wh: 60W * 4h = 240 Wh
- Example 3: Refrigerator (The Tricky One)
- Refrigerators don’t run constantly. Their compressor cycles on and off. The best way to estimate is to find its daily Wh rating, which is often listed on modern appliances. If not, a good rule of thumb for an efficient fridge is about 1/3 of its running wattage for 24 hours. So, a 150W fridge might use 150W (24 hours 0.33) = 1188 Wh/day. This is a rough estimate; actual usage can vary widely based on efficiency, ambient temperature, and how often you open the door.
1c. Summing It Up: Total Daily Energy Consumption
Once you’ve calculated the daily Wh for every single item, add them all together. This sum is your total daily energy consumption in Watt-hours. This number is your foundation. Be honest and realistic here. It’s better to slightly overestimate than to underestimate and find yourself short on power.
- A “Buffer” for Unknowns: It’s often a good idea to add a 10-20% buffer to your total. Things always pop up, and appliances sometimes draw more than their listed wattage for short bursts.
If you’re looking to deepen your understanding of off grid solar systems, you might find the article on Off-Grid Systems Explained particularly useful. It provides valuable insights into the foundational concepts of off-grid living, which can complement the step-by-step guide on sizing an off-grid solar system. By exploring both resources, you can gain a comprehensive view of how to effectively harness solar energy for your needs.
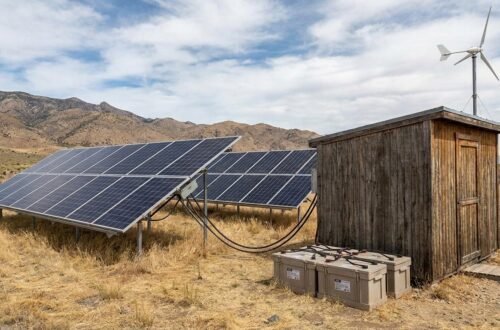
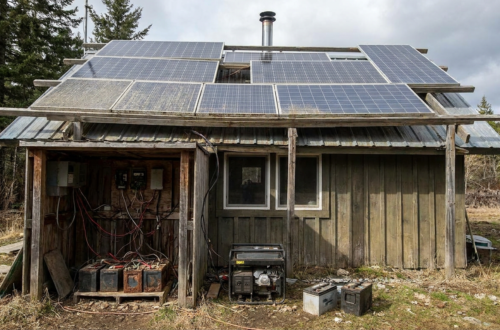
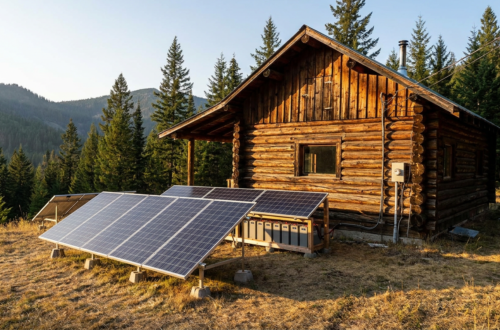
2. Choosing Your Battery Bank (Energy Storage)
Your battery bank is the heart of your off grid system; it stores the energy your solar panels produce. You need enough storage to power your home during the night and potentially for several cloudy days.
2a. Days of Autonomy: How Long Without Sun?
This is a critical decision. How many days do you want your system to be able to power your home without any sun? This is called “days of autonomy.”
- Typical Recommendation: 2 to 5 days is common.
- 2-3 Days: Good for areas with very consistent sunshine and minimal cloudy periods.
- 4-5 Days: Better for areas with frequent overcast weather or if you want peace of mind.
- Weather Patterns: Consider your local weather. Does it often rain for days on end? This directly impacts your autonomy needs.
2b. Battery Capacity Calculation
Now we combine your daily energy consumption with your desired days of autonomy.
- Total Watt-Hours Needed: (Total Daily Energy Consumption in Wh) * (Days of Autonomy)
Let’s use an example:
- Your calculated daily consumption: 3,000 Wh
- Desired days of autonomy: 3 days
- Total Wh needed from battery: 3,000 Wh/day * 3 days = 9,000 Wh
2c. Depth of Discharge (DOD)
Batteries don’t like to be fully drained. Draining them too deeply reduces their lifespan significantly. This is called “Depth of Discharge” (DOD).
- Lead-Acid Batteries: Typically, you’ll aim for a maximum 50% DOD for a reasonable lifespan. This means if you need 9,000 Wh, your lead-acid battery bank actually needs to hold 18,000 Wh.
- Lithium Iron Phosphate (LiFePO4) Batteries: These are much more robust and can often be safely discharged to 80-90% DOD, significantly reducing the required bank size compared to lead-acid. For 9,000 Wh with an 80% DOD, you’d need a battery bank that holds 9,000 Wh / 0.80 = 11,250 Wh.
- Calculating Actual Usable Capacity: (Total Wh Needed from Battery) / (Recommended DOD expressed as a decimal)
2d. Battery Voltage and Amp-Hours (Ah)
Batteries are rated in Amp-hours (Ah) and Volts (V). Common system voltages are 12V, 24V, and 48V. Higher voltages are generally more efficient for larger systems as they reduce current, which means thinner wires and less energy loss.
- Calculating Amp-Hours: Once you have your total usable watt-hours, divide that by your chosen system voltage to get the required Amp-hours (Ah).
- Ah = (Usable Watt-Hours) / (System Voltage)
Example Continuing:
- Usable Watt-Hours (LiFePO4, 80% DOD): 11,250 Wh
- System Voltage: Let’s choose 48V (good for systems over 3,000 Wh daily)
- Required Ah: 11,250 Wh / 48V = 234.375 Ah
So, you’d be looking for a battery bank that can provide roughly 235 Ah at 48V. This might mean one large 48V 235Ah battery, or several smaller batteries connected in series and/or parallel to achieve this capacity and voltage.
3. Sizing Your Solar Panels (Energy Generation)
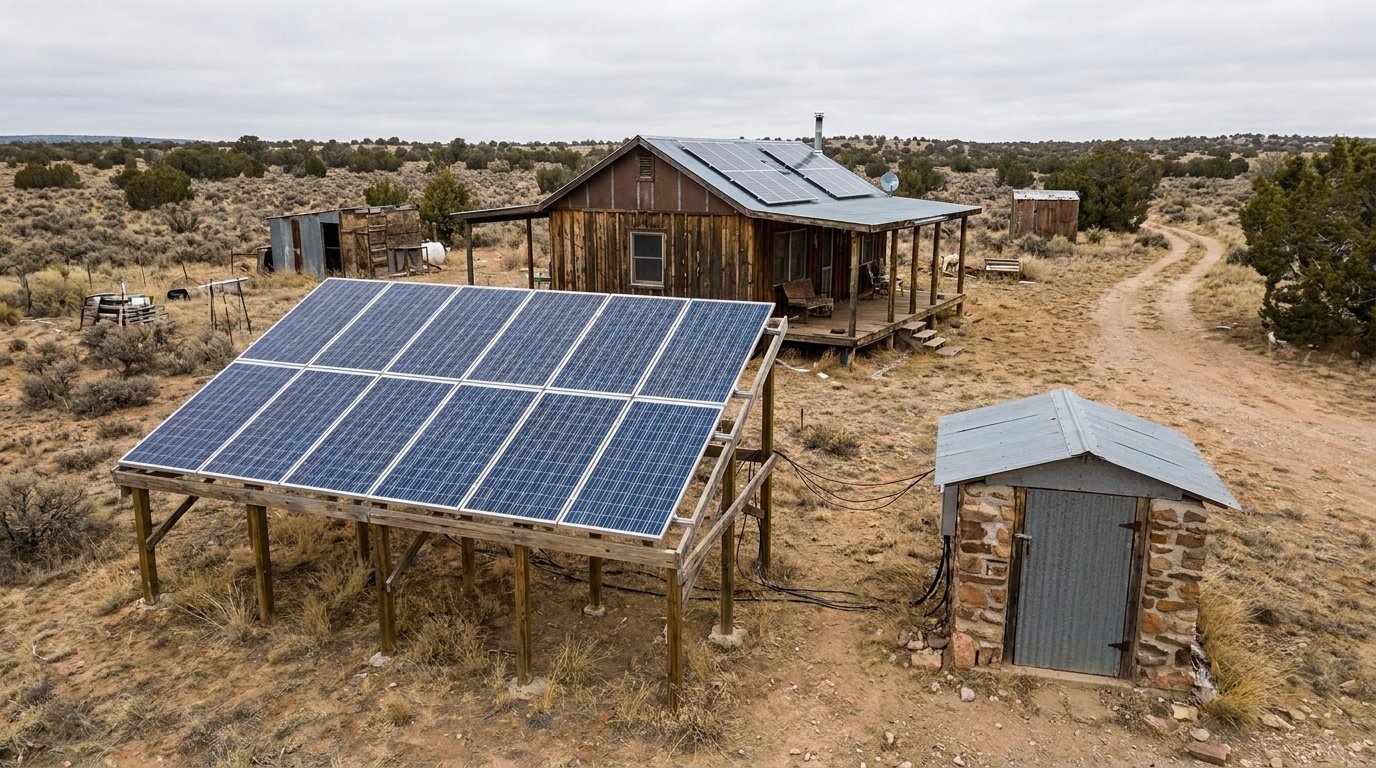
Now that you know how much energy you need to store and consume, you can figure out how many solar panels you’ll need to generate that energy.
3a. Peak Sun Hours (PSH)
This is a critical factor often overlooked. “Peak Sun Hours” (PSH) is the equivalent number of hours per day your solar panels receive peak (1000 W/m²) sunlight. This isn’t just how long the sun is in the sky, but how many hours it’s directly hitting your panels with full intensity.
- Location Matters: PSH varies significantly by geographic location, time of year, and even local obstructions (trees, mountains).
- Finding Your PSH: There are many online resources for this. A quick search for “average peak sun hours [your location]” will usually lead you to maps or tables. For instance, the National Renewable Energy Laboratory (NREL) in the US has great data.
- Conservative Estimate: Always use the lowest PSH for the worst month you plan to be off-grid. If you’re building a year-round system, use the PSH for winter months. For most of the US, typical winter PSH might be 3-5 hours, while summer could be 6-8 hours.
Let’s assume our location has a PSH of 4.5 hours in the winter.
3b. Accounting for System Losses
No solar system is 100% efficient. You’ll lose some energy due to:
- Temperature: Panels are less efficient when hot.
- Dust & Dirt: Accumulation on the panel surface.
- Inverter Efficiency: Converting DC to AC loses some power.
- Wire Losses: Resistance in cables.
- Battery Charging Efficiency: Batteries aren’t 100% efficient at storing and releasing energy.
A typical system loss factor used in calculations is between 15% and 25%. Let’s use a conservative 20% loss (0.80 efficiency factor).
3c. Calculating Panel Wattage
Here’s the formula to determine the total wattage of your solar array:
- **Required Panel Wattage (Wp) = (Daily Energy Consumption in Wh) / (PSH * System Efficiency Factor)**
Continuing our example:
- Daily Energy Consumption: 3,000 Wh
- PSH: 4.5 hours
- System Efficiency Factor: 0.80 (for 20% losses)
- Required Panel Wattage = 3,000 Wh / (4.5 hours * 0.80)
- Required Panel Wattage = 3,000 Wh / 3.6
- Required Panel Wattage = 833.33 Wp
So, you’d need roughly 835 Watts of solar panels.
3d. Number of Panels
Now that you know the total wattage needed, you can figure out how many individual panels you need. Solar panels typically come in wattages like 100W, 200W, 300W, or even 400W+.
- Number of Panels = (Required Panel Wattage) / (Wattage of one panel)
Example: If you choose 300W panels:
- Number of Panels = 835 Wp / 300 Wp/panel = 2.78 panels.
- Always round up! So, you’d need 3 x 300W panels for a total of 900 Wp.
It’s better to slightly oversize your panels than undersize them, especially if you opted for a lower PSH in your calculation.
4. Selecting Your Inverter
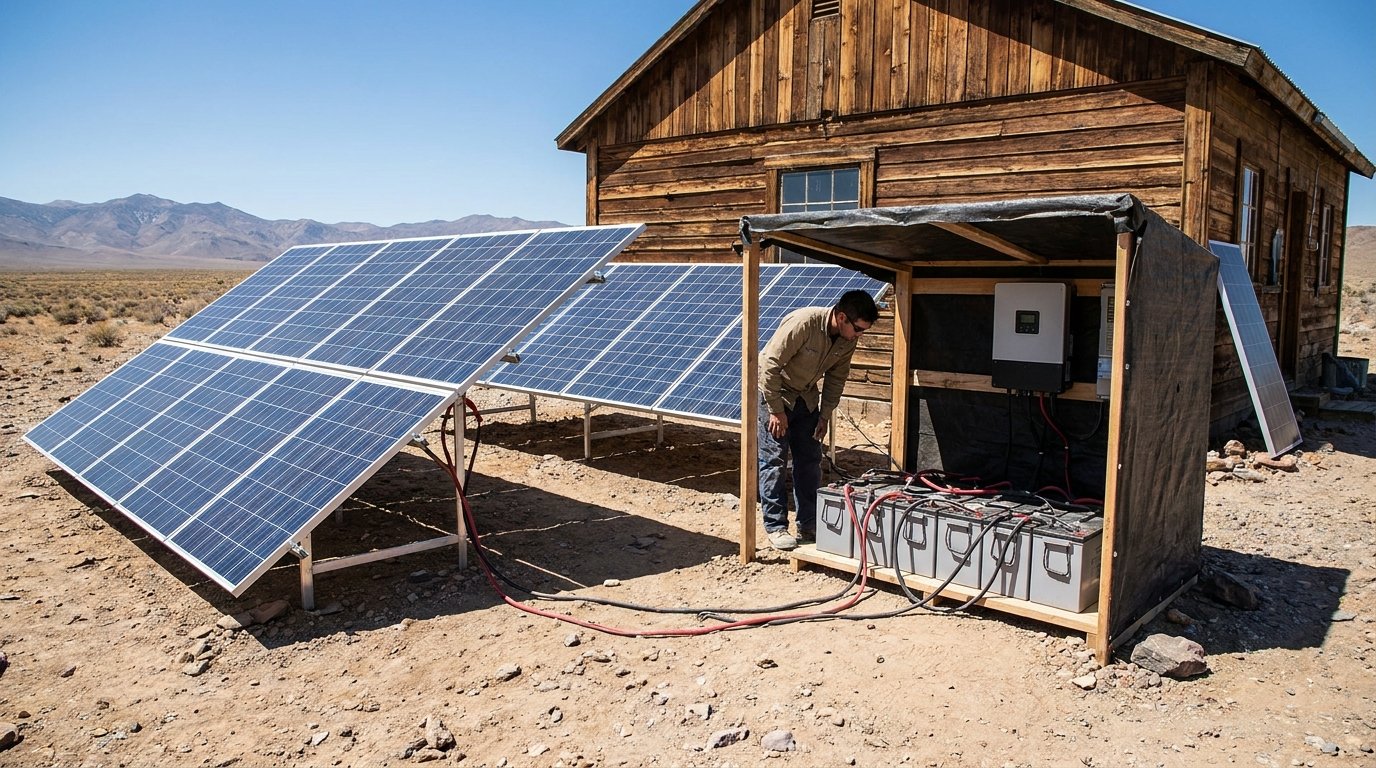
The inverter is the brain of your DC-to-AC conversion. Most household appliances run on AC (Alternating Current), but solar panels and batteries produce/store DC (Direct Current). The inverter changes DC power into AC power.
4a. Inverter Sizing: Continuous and Surge Power
Inverters have two main power ratings:
- Continuous Power: This is the maximum amount of power the inverter can supply constantly. To figure this out, sum up the running wattage of all the AC appliances you anticipate running simultaneously at their highest drawing point. Don’t forget parasitic loads like internet routers or always-on devices.
- Surge Power: Many appliances (especially those with motors, like refrigerators, pumps, or microwaves) draw a much higher amount of power for a brief moment when they first start up. This is the “surge.” Your chosen inverter must be able to handle these surge loads without shutting down. Typically, a surge rating should be at least 2-3 times higher than the continuous rating for a short period.
Example:
- Simultaneous continuous load:
- Fridge Running: 150W
- Lights: 50W
- Laptop: 60W
- TV: 100W
- Total Continuous: 360W
- Highest Surge: If the fridge surges to 1000W when it starts, even if everything else is running, the inverter needs to handle (360 – 150) + 1000 = 1210W briefly.
- General Rule: A safe bet is to size your inverter to be at least 1.5 to 2 times your maximum continuous load, ensuring it can handle most typical surges. For homes with significant motor loads, like well pumps, you might need an even larger surge capacity.
- System Voltage Match: Your inverter’s input voltage (e.g., 12V, 24V, 48V) must match your battery bank’s voltage.
4b. Pure Sine Wave vs. Modified Sine Wave
- Pure Sine Wave: This is essential for most modern electronics, sensitive equipment, and anything with a motor. It produces a clean waveform, just like utility power. Always opt for a pure sine wave inverter for an off-grid home.
- Modified Sine Wave: Cheaper, but can damage sensitive electronics, cause motors to run hotter and less efficiently, and create humming noises. Avoid these for anything beyond basic resistive loads like old incandescent bulbs or heating elements.
If you’re looking to dive deeper into the world of solar energy, you might find the Department of Energy’s solar basics particularly useful. It provides a comprehensive overview of how solar panels work and the various components involved in setting up an off grid system. Understanding these fundamentals can greatly enhance your ability to effectively size your off grid solar system, ensuring you meet your energy needs efficiently.
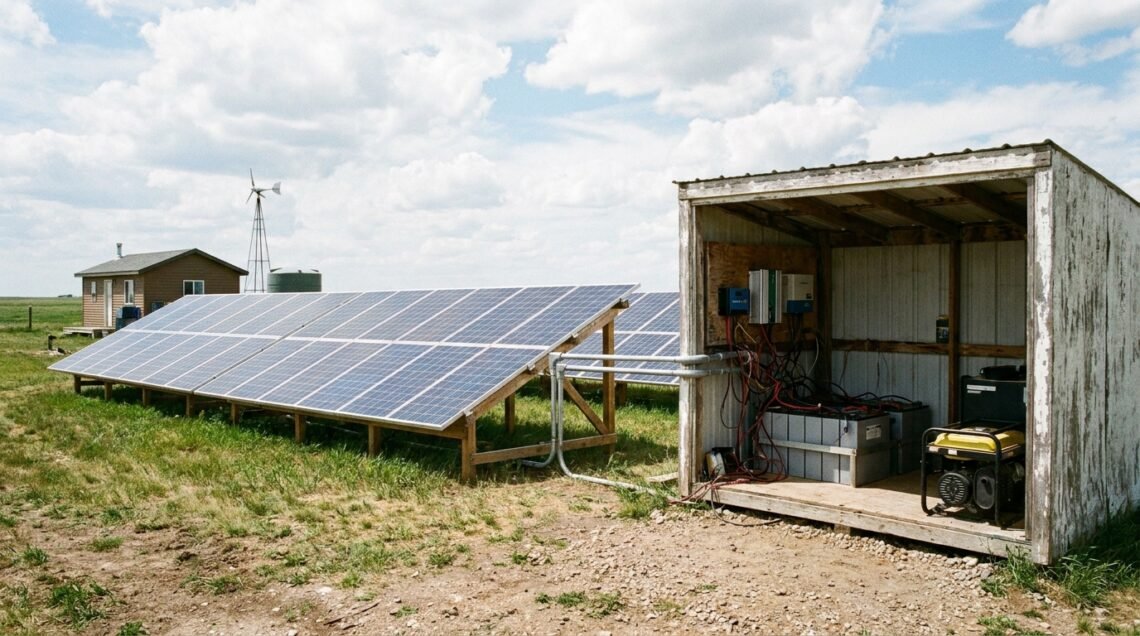
5. Other Essential Components & Protection
| Step | Description |
|---|---|
| Step 1 | Calculate your daily energy consumption (kWh) |
| Step 2 | Determine the peak sun hours in your location |
| Step 3 | Calculate the total energy needed per day (kWh) |
| Step 4 | Select the solar panel wattage and quantity |
| Step 5 | Choose the appropriate battery capacity (Ah) |
| Step 6 | Select a charge controller and inverter |
| Step 7 | Calculate the total cost of the system |
While panels, batteries, and inverters are the big three, an off-grid system needs a few other critical pieces to function safely and efficiently.
5a. Charge Controller (MPPT vs. PWM)
The charge controller is vital for managing the power flow from your solar panels to your batteries. It prevents overcharging and optimizes charging.
- PWM (Pulse Width Modulation): Simpler, less expensive, but less efficient. Best for small systems (under 200-300W) or when the panel voltage closely matches the battery bank voltage. Doesn’t “down-convert” excess voltage efficiently.
- MPPT (Maximum Power Point Tracking): More advanced, more efficient (15-30% more efficient than PWM). It can take a higher voltage from the solar array and convert it down to the battery voltage, utilizing more of the panel’s power. Highly recommended for almost any off-grid system of decent size.
- Sizing the Charge Controller: This is based on the maximum amperage from your solar panels and your battery bank voltage.
- Max Amps = (Total Panel Wattage) / (Battery Bank Voltage) / (0.9 for MPPT efficiency)
- Example: 900W panels / 48V battery / 0.9 = ~20.8 Amps. You’d want a 30A MPPT charge controller (always round up and give yourself headroom).
- Always check the controller’s maximum PV input voltage as well. Your panel series string voltage must not exceed this, especially in cold weather.
5b. Wiring and Fuses/Breakers
This is where safety comes in. Don’t skimp here.
- Wire Sizing: Improperly sized wires can lead to significant energy loss and, more importantly, a fire hazard. Wires need to be sized based on the current (Amps) they will carry and the distance. Use online wire sizing calculators or consult electrical tables.
- Overcurrent Protection: Fuses and breakers are essential on all main circuits – between panels and charge controller, charge controller and battery bank, and battery bank and inverter. They protect your components and prevent fires in case of a short circuit or overload.
- DC vs. AC Breakers: Ensure you use DC-rated breakers for DC circuits and AC-rated breakers for AC circuits. They are not interchangeable.
5c. Disconnect Switches
Install manual disconnect switches for your solar array and your battery bank. These allow you to safely shut down sections of your system for maintenance or in an emergency.
5d. Grounding
Proper grounding is critical for safety. It protects against lightning strikes and electrical faults. This is typically done by connecting specific points of your system to a ground rod driven into the earth. If you’re unsure about grounding, consult an electrician.
Putting It All Together
Once you’ve crunched these numbers, you’ll have a much clearer picture of what you need:
- Daily Watt-Hours: How much energy you use.
- Battery Bank Size: How much storage you need (in Wh or Ah), considering days of autonomy and DOD.
- Solar Panel Wattage: How many watts of panels you need to produce that energy, considering peak sun hours and system losses.
- Inverter Size: What continuous and surge power capacity you need.
- Charge Controller Size: What type and rating you need.
Remember, this is a calculated estimate. It’s always wise to add a little buffer (10-20%) to your energy consumption and panel sizing. It’s also highly recommended to consult with experienced off grid solar professionals, especially for larger or more complex systems. They can help fine-tune your calculations, ensure code compliance, and help you select the right components for your specific needs and budget. Good luck with your off-grid journey!
FAQs
1. What is an off-grid solar system?
An off-grid solar system is a setup that allows you to generate and store your own electricity without being connected to the main power grid. It typically consists of solar panels, a charge controller, a battery bank, and an inverter.
2. How do I determine the size of an off-grid solar system?
To size an off-grid solar system, you need to calculate your daily energy consumption, consider the peak sun hours in your location, and factor in any inefficiencies in the system. This will help you determine the number of solar panels, batteries, and inverter capacity needed for your specific energy needs.
3. What are the key components of an off-grid solar system?
The key components of an off grid solar system include solar panels to capture sunlight and convert it into electricity, a charge controller to regulate the charging of the batteries, a battery bank to store the electricity for use at night or on cloudy days, and an inverter to convert the stored DC electricity into AC electricity for use in your home.
4. What are the benefits of an off-grid solar system?
Off-grid solar systems provide energy independence, allowing you to generate your own electricity and reduce reliance on the main power grid. They also offer environmental benefits by reducing reliance on fossil fuels and lowering carbon emissions. Additionally, off-grid solar systems can provide power in remote locations where grid connection is not feasible.
5. What are some considerations when sizing an off-grid solar system?
When sizing an off-grid solar system, it’s important to consider your energy needs, the available sunlight in your location, the efficiency of the system components, and the cost of the system. Additionally, factors such as the type of appliances and devices you plan to power, as well as any future expansion of your energy needs, should be taken into account.


3 Comments on “How to Size an Off-Grid Solar System (Effortless Beginner Guide)”