
Building an off-grid cabin is definitely a big project, but it’s totally achievable, even if you’re new to construction. The quick answer to how you do it involves a lot of planning, site prep, building a solid foundation, framing the structure, getting your roof on, and then tackling all the essential systems like electricity, water, and waste. It’s a journey, and we’ll break it down into manageable steps.
Table of Contents
Getting Started: Planning Your Off-Grid Dream
Before you even think about swinging a hammer, a lot of important groundwork needs to happen. This isn’t just about dreaming; it’s about making sure your dream cabin is actually possible and won’t cause you headaches down the line.
Vision & Budget First
Seriously, sit down and figure out what you really want. How big? What style? What level of comfort do you need? This vision will inform your budget. Be realistic. Off-grid often implies saving money, but a well-built, functional, off-grid cabin still requires a decent investment. Account for materials, tools, and potentially hiring help for specialized tasks.
Find Your Land Wisely
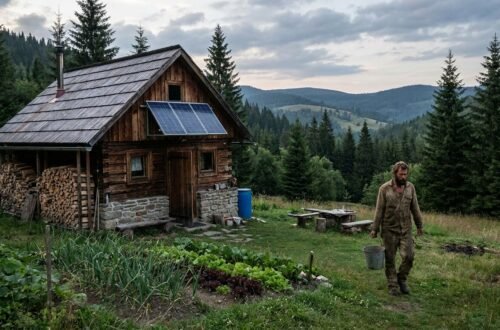
The land you choose is super important. Look for affordable plots, but don’t compromise on essentials. You’ll want good water access (a well, stream, or rainwater collection potential) and safe terrain – avoid flood zones or areas prone to landslides. Consider sun exposure for solar panels and access for materials.
Local Rules & Regulations
This is probably the least exciting part, but it’s critical. Zoning laws, permits, and any specific rules for tiny homes or remote structures can vary wildly by location. Check with your local county or municipality before you buy land or start digging. You don’t want to invest time and money only to find out you’re breaking rules.
Sustainable Materials
Using local and sustainable materials isn’t just good for the planet; it can also save you money on transport and sometimes even simplify permitting. Reclaimed lumber, locally sourced stone, or even logs from your own property (if managed sustainably) are great options.
If you’re interested in building an off-grid cabin, you might also want to explore the essential aspects of energy management for your new retreat. A related article that can provide valuable insights is titled “Off-Grid Solar Systems: Which is Best?” This resource offers a comprehensive overview of different solar options that can power your cabin sustainably. You can read it here: Off-Grid Solar Systems: Which is Best?. Understanding these energy systems will help you make informed decisions as you embark on your off-grid living journey.
Foundation First: A Solid Base
Your cabin’s going to stand on this, so it needs to be robust and built to last. Skimping here will cause problems down the road.
Clearing and Leveling
First things first: clear the area where your cabin will sit. Get rid of trees, stumps, large rocks, and anything else. Then, you need to level the ground. This doesn’t mean perfectly flat like a billiard table, but certainly flat enough to ensure an even and stable foundation. Excavate a bit if needed to achieve this.
Foundation Options
You’ve got a few choices for your foundation, each with pros and cons:
- Pressure-Treated 4×4 Skids: These are great for smaller, more mobile cabins. They sit directly on the ground (or on gravel pads) and allow you to potentially move the cabin later. They’re affordable and relatively simple to install.
- Concrete Deck Blocks: These are pre-made concrete blocks with recesses for joists or posts. They’re quick, easy to place, and don’t require pouring concrete. Again, good for smaller structures, but ensure the ground under them is well-compacted and level.
- Helical Piers: These are screw-in steel piles that are driven into the ground. They’re fantastic because they’re loadable immediately after installation – no waiting for concrete to cure. They’re good for unstable soil or if you need to build quickly. They usually require specialized equipment for installation.
- Poured Concrete (Piers or Slab): If you go this route, remember that concrete needs time to cure properly before it can bear the full weight of your cabin. This isn’t just a day or two; it can be weeks depending on the mix and conditions. Don’t rush it.
Floor Power: Building Your Base Structure
With your foundation in place, it’s time to get the floor down. This part sets the stage for everything else.
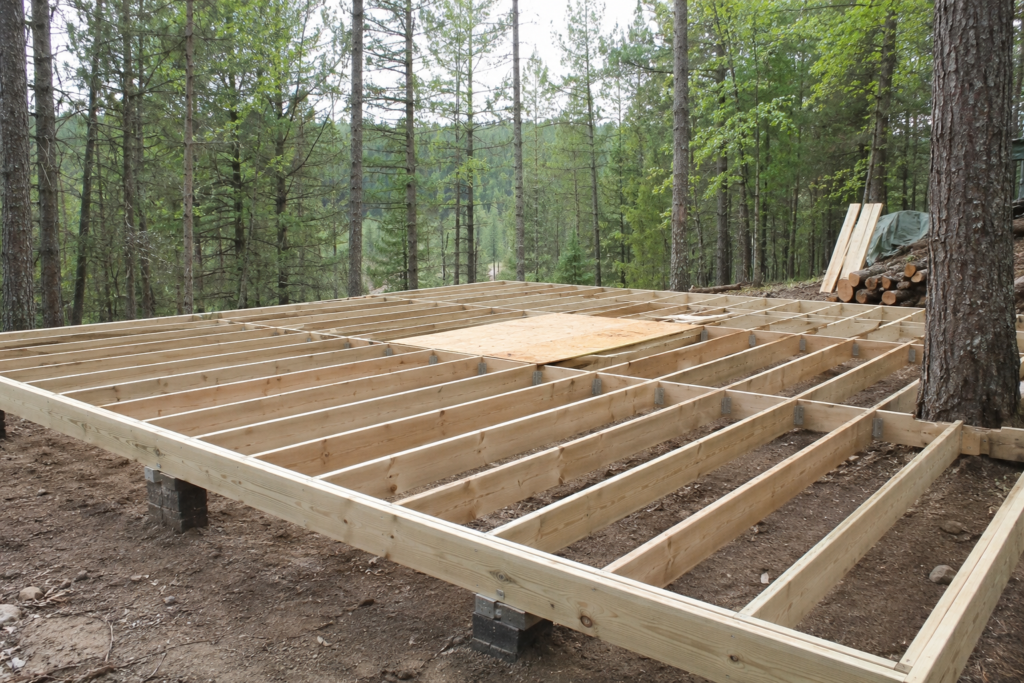
Framing the Floor
You’ll build a sturdy frame using 2×6 joists on 16″ centers. The “16-inch centers” part means the center of one joist to the center of the next is 16 inches. This spacing gives you a strong, stable floor that can handle weight. Make sure your joists are securely attached to your foundation, whether that’s notched into skids, resting in deck blocks, or bolted to concrete.
Subflooring with Care
Once the frame is solid, it’s time for the 7/16″ OSB subflooring. Here’s a pro tip: use construction adhesive along the top of your joists before you lay down the OSB. This binds the OSB to the joists and drastically reduces the chances of squeaky floors later – a common cabin annoyance!
Keep it Square
Before you start nailing down that subflooring, take the time to square your corners. Measure diagonally across your floor frame from opposing corners. If the measurements are identical, your frame is square. If not, gently push or pull a corner until it is. This might seem minor, but a square floor makes building walls so much easier. Trust me on this one.
Raising the Walls: The Log Cabin Method
If you’re going for that classic cabin look, logs are the way to go. This isn’t rough-and-tumble; it’s a careful process, but incredibly rewarding.
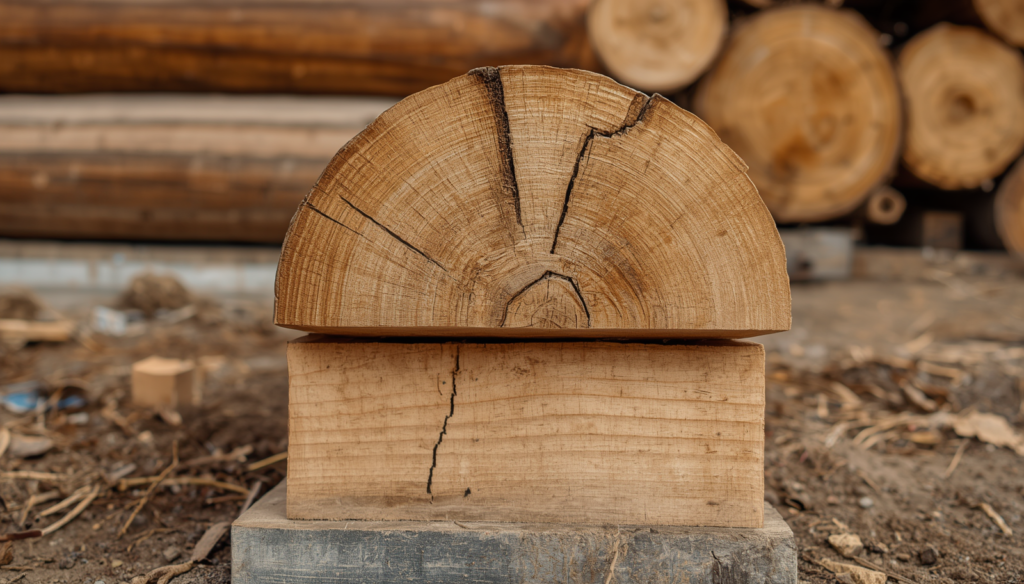
Selecting Your Logs
This isn’t a job for just any tree. You need top-quality, straight logs. Defects, excessive tapering, or rot will cause problems. Plan your log sizes carefully – you’ll use larger logs at the bottom and progressively smaller ones as you go up.
The Sill Logs
Your first logs, the ones that sit directly on your foundation, are called sill logs. These are crucial. You’ll want to split them lengthwise so they have a flat base. This provides a stable, level surface to start stacking the rest of your walls.
Notching and Stacking
This is where the artistry comes in. You’ll use a scribe to mark out the contours of one log onto the log below it, ensuring a tight fit. Then, using a chainsaw and/or chisel, you’ll cut those notches. The goal is to create interlocking corners that are as tight as possible to minimize gaps and maintain structural integrity.
- Sleeper Logs: These are your initial wall logs that sit on the sill logs.
- Wall Logs: These continue upwards.
- Progressive Stacking: As you stack, keep an eye on your wall height. You’ll progressively choose halving log sizes near the gable peak to smoothly transition into the triangular gable shape.
If you’re interested in building an off-grid cabin, you might also find it helpful to explore some common questions that beginners have about off-grid living. A related article provides answers to ten essential FAQs that can guide you through the process and help you prepare for the unique challenges of this lifestyle. To learn more, check out the article on off-grid living FAQs for beginners here. This resource can complement your cabin-building journey by offering insights into the practical aspects of living off the grid.
Covering Up: Gable and Roof Structure
Once your log walls are reaching a decent height, it’s time to think about the roof.
Reaching Half-Gable Height
You’ll continue stacking your wall logs until they reach roughly half the total height of your planned gable. This provides a solid base for the next step.
Purlin Power
Now, you’ll install parallel purlin logs that run horizontally between your gable walls. These logs are essentially roof beams that will support your rafters. They need to be securely fastened to the wall logs.
Building the Gable Triangle
With the purlins in place, you’ll continue building your triangular gable walls. This means using progressively shorter logs as you get closer to the peak of the roof, maintaining that tight, notched fit.
The Ridge Log
Once your gable walls are complete, you’ll cap them off with a sturdy ridge log at the very top. This is the peak of your roof structure.
Rafters Away!
Finally, you’ll attach your rafters (the angled pieces that form the slope of your roof) to the purlins and the ridge log. Ensure they are evenly spaced and securely fastened. This completes the skeleton of your roof.
Roughing It In: Essential Systems
Before you insulate and seal up your cabin, you need to get the “guts” of your utility systems in place. Doing this before insulation saves a ton of headaches later.
Electrical Conduit
Run your electrical conduit for all your outlets, lights, and switches. Even if you’re not connecting to the grid, this lays the groundwork for your solar system. Plan your layout carefully.
Water Lines
Install your water lines. This includes cold water for your sink, shower, and any appliances, and hot water lines if you’re planning a water heater.
Propane Lines
If you’re using propane for cooking, heating, or a water heater, run your propane lines now. This often requires a certified professional, so factor that in.
Waste Drain Lines
This is critical and tricky: install your **waste drain lines before decking or pouring any concrete. Slope is absolutely critical for proper drainage and once those lines are in, it’s irreversible** without major demo. Plan your toilet, sink, and shower drain locations meticulously.
Sealing the Deal: Insulation & Envelope
Now that your rough systems are in, it’s time to make your cabin comfortable and energy-efficient.
Insulate Everything
You’ll want to insulate the walls, ceiling, and floor. There are various options like fiberglass bats, rigid foam, or blown-in cellulose. Pay special attention to thermal bridges and air gaps. For the floor, spray foam rim joists are highly recommended as they provide an excellent air seal and insulation where the floor meets the foundation.
The Building Envelope
Prioritize completing the building envelope before installing any interior finishes or permanent systems. This means getting your structure, insulation, and roofing all completely sealed and weather-tight. Once your envelope is done, you’re protected from the elements, and you can work on the interior at a more relaxed pace.
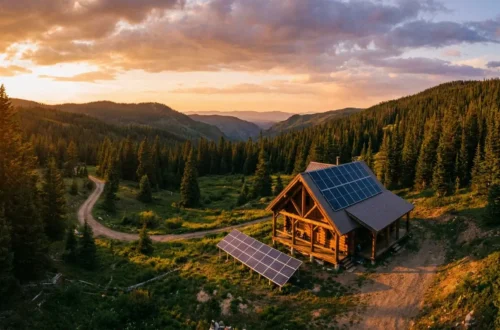
Powering Up: Solar & Utilities
This is where your off-grid cabin truly becomes self-sufficient.
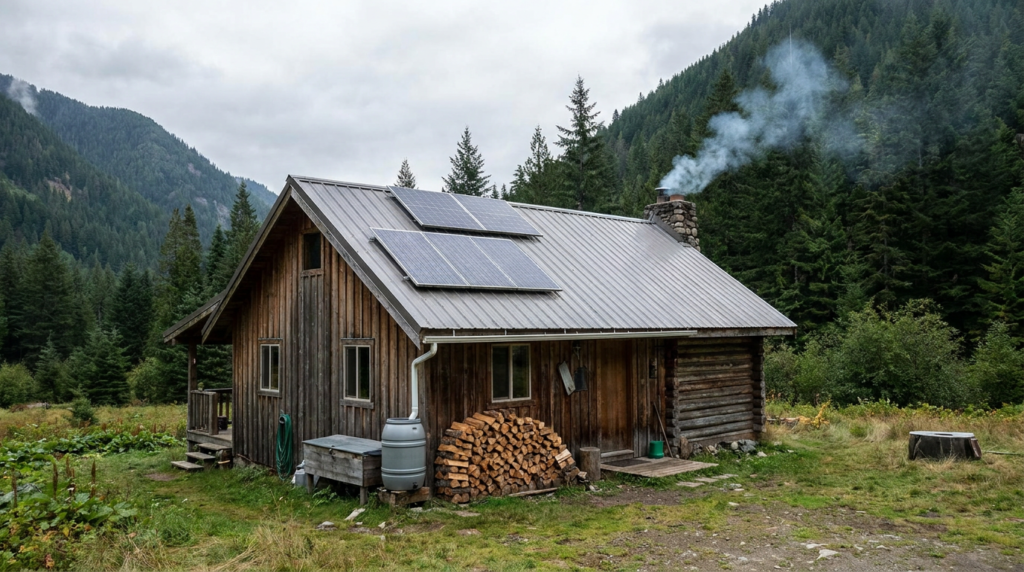
Solar Power Setup
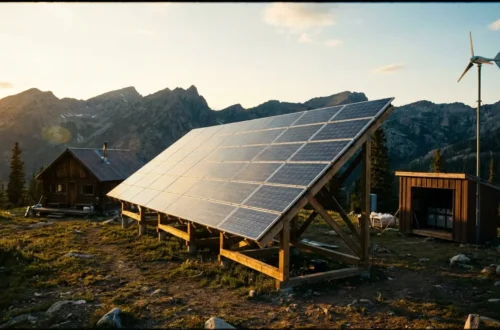
- Mounting Panels: Install your solar panels on the roof. Make sure they are angled correctly for maximum sun exposure in your location.
- Conduit to Batteries: Run dedicated conduit from your solar panels to the location of your internal battery bank.
- The Brains of the Operation: Install your charge controller (regulates power from panels to batteries), inverter (converts DC battery power to AC for your appliances), and of course, your batteries. This system is often best designed and installed with input from an experienced solar professional.
Water Management
- Source: You’ll need a water source. This could be a well, a natural spring, or an elaborate rainwater collection system.
- Storage: Plan for water storage – tanks are common.
- Pump & Filtration: Install a pump to get water from storage to your fixtures and a robust filtration system to ensure it’s potable.
- Backup Options: Always have backup options. For example, a hand pump for your well or a separate gravity-fed filter for emergencies.
The Home Stretch: Interior Finish
This is the fun part where your cabin starts to feel like home. This phase is also often the most forgiving for beginners and can be tackled at your own pace.
Walls and Floors
You can choose between drywall or paneling for your interior walls. Drywall gives a more conventional home look, while wood paneling can enhance the rustic cabin feel. Install your chosen flooring – hardwood, laminate, or tile are common.
Fixtures & Trim
Install your kitchen and bathroom fixtures. This includes sinks, countertops, shower, and toilet (if you have indoor plumbing). Finish off with all your trim – baseboards, door frames, and window casings – which give a polished, finished look to your interior.
Final Thoughts for Beginners
Building an off-grid cabin is a massive undertaking, but it’s incredibly rewarding. Have a clear plan, stick to your budget, and don’t be afraid to ask for help or research specific tasks. Use sustainable materials where possible, and always, always double-check local regulations. Take your time, enjoy the process, and soon you’ll have a cozy, self-sufficient retreat to call your own.
FAQs
1. What is an off-grid cabin?
An off-grid cabin is a small, self-sufficient dwelling that is not connected to the main electrical grid, water supply, or sewer system. It is designed to operate independently, using renewable energy sources and sustainable practices.
2. What are the basic steps to build an off-grid cabin?
The basic steps to build an off-grid cabin include site selection, obtaining necessary permits, designing the cabin, gathering materials, constructing the foundation, framing the structure, installing utilities, and finishing the interior and exterior.
3. What are some essential considerations for building an off-grid cabin?
Some essential considerations for building an off-grid cabin include choosing a suitable location with access to sunlight and water, selecting energy-efficient and sustainable building materials, designing for energy conservation, and planning for waste management and water usage.
4. What are the key components of off-grid cabin construction?
The key components of off-grid cabin construction include solar panels or wind turbines for electricity, rainwater collection or well water for drinking and household use, composting toilets or septic systems for waste management, and efficient insulation and heating systems for climate control.
5. What are some important safety and legal considerations for building an off-grid cabin?
Important safety and legal considerations for building an off-grid cabin include complying with building codes and zoning regulations, ensuring structural stability and fire safety, obtaining necessary permits and approvals, and implementing proper safety measures during construction and occupancy.


One comment on “How to Build an Off-Grid Cabin Made Easy (Step-by-Step Beginner Guide)”