Got rainwater and wondering how to purify rainwater for drinking at home or if you can drink it straight from the sky? The short answer is: not usually, or at least not without some serious purification. While rainwater itself is naturally soft and relatively pure, it picks up a lot of junk on its journey down – everything from dust and leaves to animal droppings and even microscopic contaminants. So, to make it safe for your tap, you’ll need to treat it. This guide will walk you through the practical steps of purifying rainwater for drinking at home.
Freshly fallen rain might seem pristine in a nature documentary, but by the time it reaches your collection barrel, it’s a different story. Think of it as a free delivery service that unfortunately sometimes includes unscheduled cargo. Understanding what you’re trying to remove is the first step in choosing the right purification methods.
Table of Contents
The Invisible Nasties
Rainwater can pick up all sorts of things that aren’t good for you. We’re talking about bacteria, viruses, parasites, and other microorganisms that can cause a range of illnesses. These little guys are often invisible to the naked eye, but they can definitely make you sick.
Tiny Particles and Debris
Leaves, twigs, dust, pollen, and even roofing material can get washed into your rainwater. While some of this is visible, finer particles can pass through initial collection filters, and you wouldn’t want them in your morning cup of coffee or your drinking glass.
Chemical Contaminants
Depending on your location, rainwater can absorb chemicals from the atmosphere. This could include pollutants from industrial areas or even agricultural runoff. While less common than biological contaminants, these are still a concern for long-term health.
If you’re interested in learning more about sustainable living practices, you might find the article “The Brutal Truth of Off-Grid Living” quite enlightening. It explores the challenges and rewards of living independently from traditional utilities, which can complement your understanding of how to purify rainwater for drinking at home. For more insights, check out the article here: The Brutal Truth of Off-Grid Living.
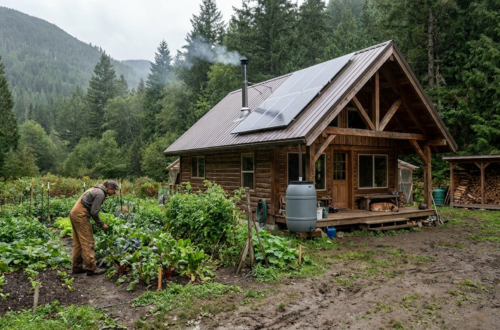
Setting Up for Success: Collection is Key
Before you even think about purifying, how you collect your rainwater matters a great deal. A well-designed collection system is your first line of defense against contamination. Get this right, and you’ll make the purification process much simpler and more effective.
Choosing Your Collection Surface Wisely
What’s on your roof really matters. Metal roofs, especially newer ones, are generally a good choice because they shed water cleanly. Avoid asphalt shingles if possible, as they can leach chemicals over time. Older roofs, or those with moss or lichen growth, are also best avoided for drinking water collection. If you have a choice, opt for a roofing material that’s known to be inert and clean.
The Importance of Gutters and Downspouts
Your gutters are the initial point of entry for water into your system. They need to be kept clean and free of debris. Clogged gutters mean stagnant water, which is a breeding ground for bacteria. Ensure they are angled correctly to direct water efficiently to your downspouts. Consider using leaf guards on your gutters to prevent larger debris from entering your system in the first place.
First Flush Diversion: Your First Filter
This is a critical component often overlooked. A “first flush diverter” is a device that sits on your downspout and diverts the initial flow of rainwater, which is the dirtiest, away from your storage tank. Think of it as flushing the system before you collect the good stuff. These are relatively inexpensive and can be DIY friendly. They typically fill with the first few gallons of rain, and then a valve opens to let the cleaner water flow into your tank.
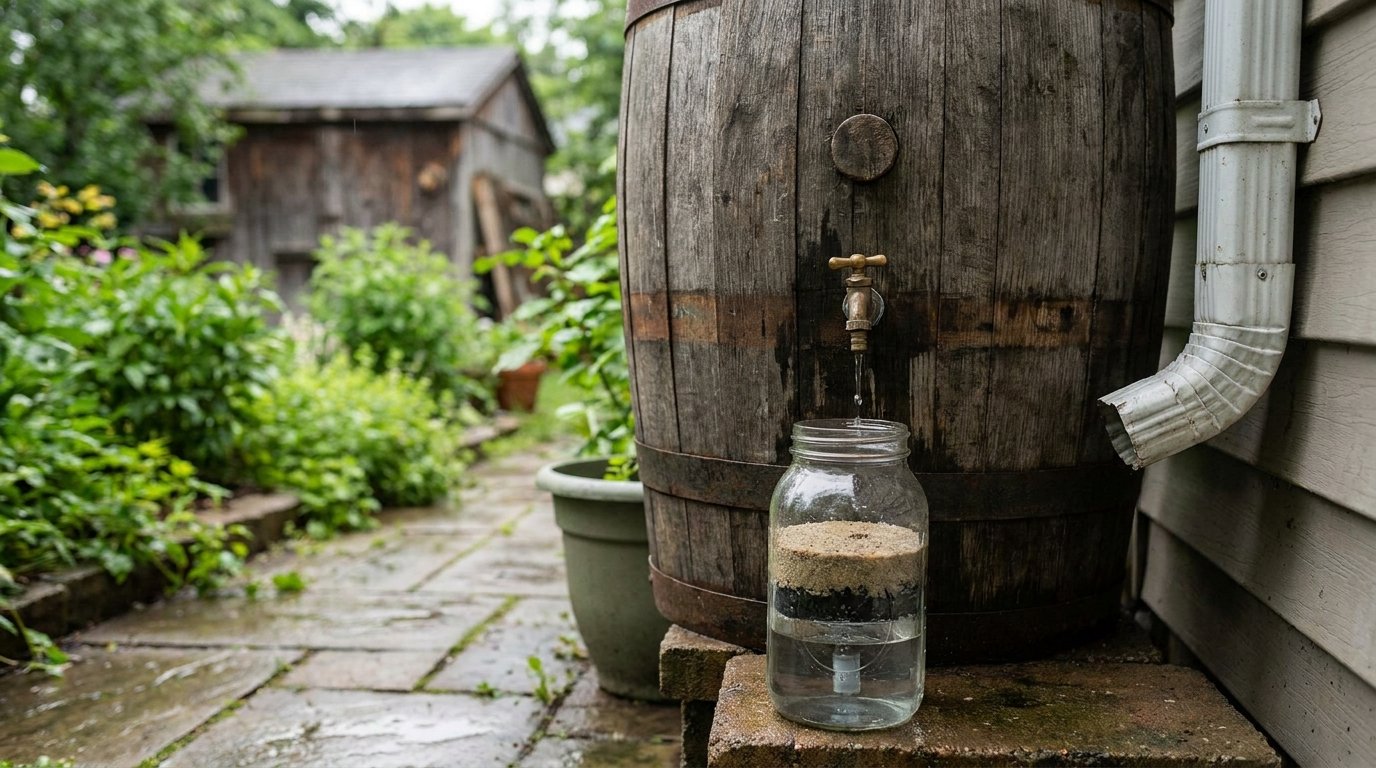
Tank Selection and Maintenance
The storage tank itself needs careful consideration. Food-grade plastic (like HDPE) or concrete tanks are generally suitable. Avoid metal tanks unless they are specifically lined and approved for potable water. Whatever material you choose, it should be opaque to prevent algae growth. Regular cleaning of your tank is essential. Over time, sediment can build up, and this can become a source of contamination. A good rule of thumb is to inspect and clean your tank at least once a year.
The Multi-Stage Approach: A Practical Purification Process
Purifying rainwater effectively usually involves a series of steps, each targeting different types of contaminants. Think of it like layering your defenses. You wouldn’t just use one tool to clean a messy kitchen; you’d use a few different ones.
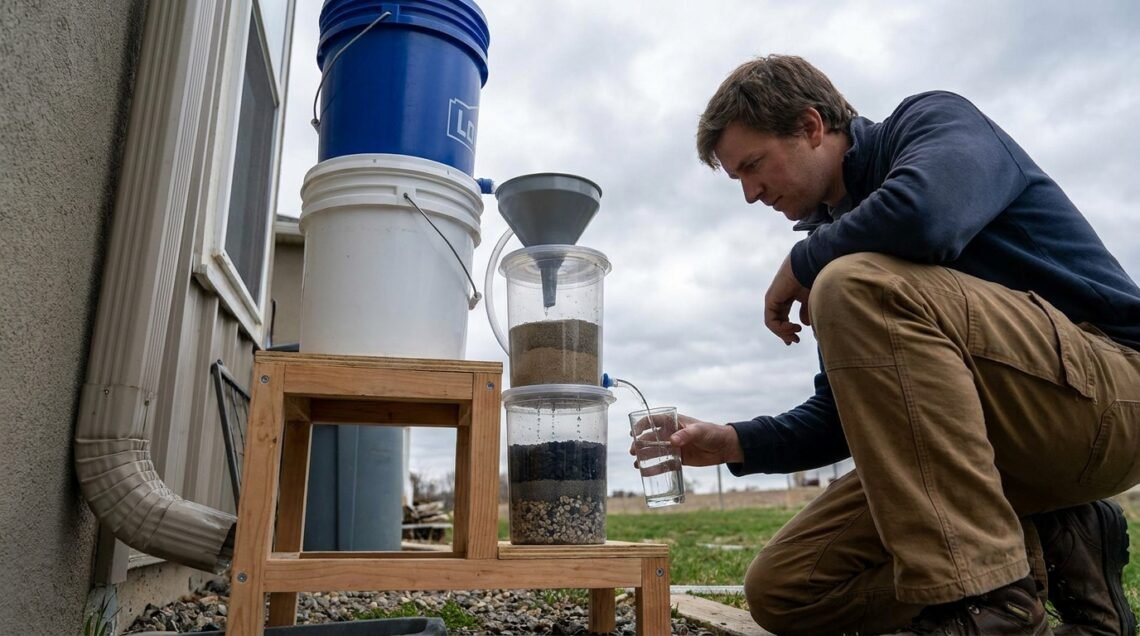
Stage 1: Sediment Filtration – Getting the Visible Stuff Out
This is where you remove the larger particles. If you’ve got a good first flush diverter, you’ll have removed a lot already, but this step catches what remains.
Pre-filters for Collected Water
Before the water even enters your main purification system, a basic sediment filter can do wonders. These are usually simple mesh filters that catch leaves, grit, and other visible debris. They are often installed at the inlet of your storage tank or before the pump.
Cartridge Filters: The Workhorses
These are the most common type of sediment filter for home use. They come in various micron ratings (a measure of pore size). For rainwater, you’ll likely want to start with a coarser filter (e.g., 50-100 micron) followed by finer ones (e.g., 5-20 micron). These filters are replaceable and relatively inexpensive. You can often find housings that accept standard filter cartridges.
Stage 2: Biological Disinfection – Killing the Germs
This is the most crucial step for ensuring the water is safe to drink. You need to eliminate bacteria, viruses, and parasites.
UV Sterilization: The Light Fantastic
Ultraviolet (UV) sterilizers are highly effective at killing microorganisms. The water passes through a chamber where it’s exposed to UV light, which damages the DNA of these pathogens, rendering them harmless. UV systems are effective without adding chemicals, which is a big plus for many people. However, they require electricity and the UV lamp needs periodic replacement. It’s also important that the water entering the UV system is already clear; sediment can block the UV light.
Chlorination: The Old Reliable (with caveats)
Chlorine is a well-known disinfectant. You can add liquid chlorine bleach (ensure it’s unscented and has no additives) to your water. The key here is getting the dosage right – too little and it’s ineffective, too much and you’ll taste and smell it. You’ll also need to allow a contact time for the chlorine to work. A major drawback is the taste and odor, and chlorine can react with organic matter in the water to form potentially harmful byproducts over time. It also doesn’t kill all types of parasites.
Boiling: The Ultimate Backup
Boiling water is a foolproof method for killing all pathogens. If you have any doubts about your primary purification method, or if your system fails, boiling your collected water for at least one minute (or three minutes at altitudes above 6,500 feet) is the safest option. This is usually impractical for large volumes of water for daily consumption, but it’s an excellent safety net.
Stage 3: Advanced Filtration and Polishing – For Taste and Purity
Once the water is safe, you might want to improve its taste, remove any lingering odors, or take care of finer impurities.
Activated Carbon Filters: The Great Deodorizers and Tastemakers
Activated carbon filters are excellent at removing chlorine (if you used it), volatile organic compounds (VOCs), and other substances that affect taste and odor. They work by adsorption, trapping impurities on their porous surface. These are often used in conjunction with sediment filters and UV sterilizers.
Reverse Osmosis (RO): The Deep Clean
For incredibly pure water, reverse osmosis is a top-tier option. An RO system uses a semi-permeable membrane to remove a vast majority of dissolved solids, salts, and contaminants. However, RO systems are more complex, require regular maintenance (membrane replacement), and can be slower to produce water. They also tend to waste water in the process.
Putting It All Together: A Typical Rainwater Purification System
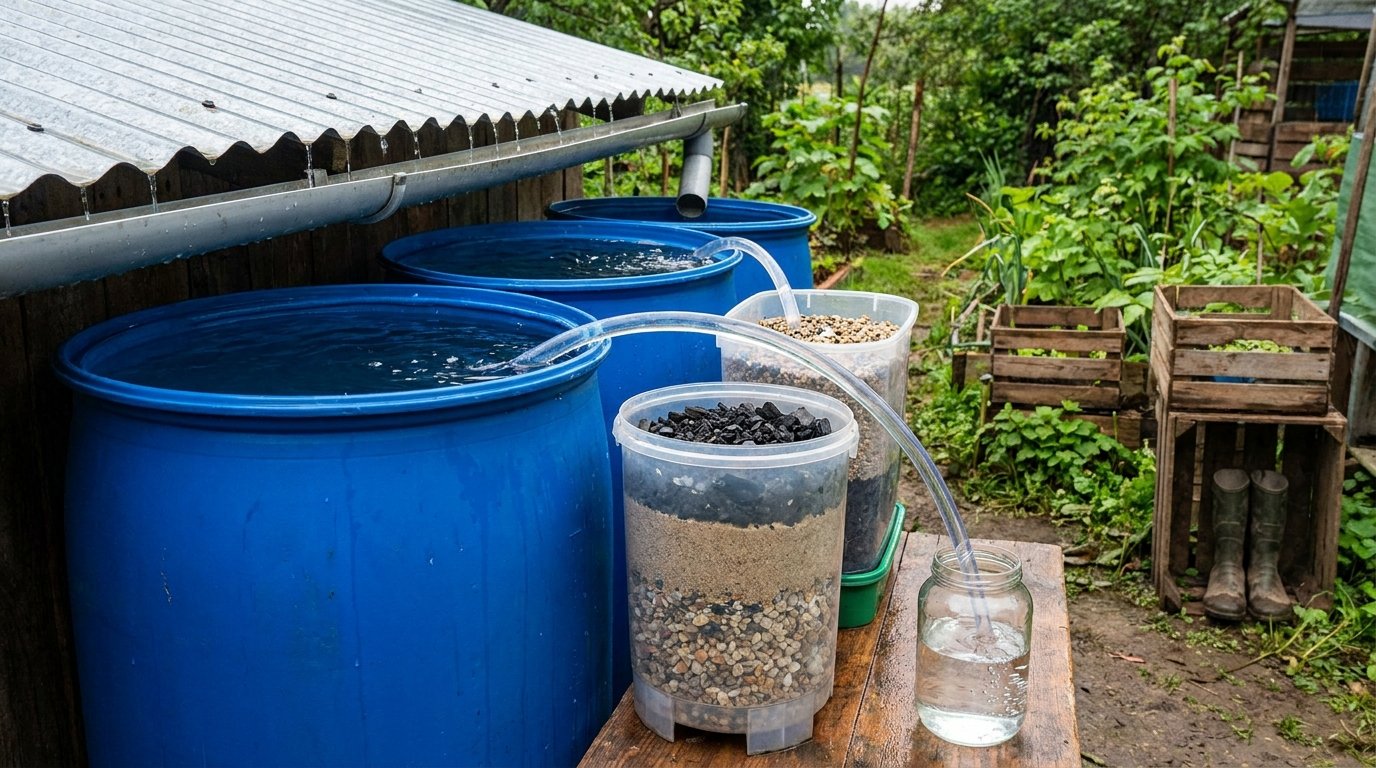
Let’s visualize how these components might work in a home system. You don’t necessarily need all of these steps, but this is a comprehensive overview.
The Collection Point and Initial Filtering
Rain falls on your roof, washing into your gutters.
A leaf guard prevents large debris.
Water flows through a first flush diverter.
It enters your storage tank, which is opaque and has a screened inlet.
Pumping and Sediment Removal
A submersible pump (or a surface pump) pulls water from the tank.
The water passes through a series of sediment filters in sequential micron ratings (e.g., 50 micron, then 5 micron).
Biological Disinfection
After sediment filtration, the water flows through a UV sterilizer chamber. The UV light inactivates any remaining bacteria or viruses.
Taste and Odor Improvement
Following the UV, the water passes through an activated carbon filter to remove any residual tastes or smells, and to polish the water.
Ready for Use
The purified water is now available for all your household needs, including drinking, cooking, and bathing. Some people opt to have a separate drinking water tap connected to an even more robust system, like reverse osmosis, if they are particularly concerned about water purity.
If you’re interested in learning more about sustainable living practices, you might find the article on how to purify rainwater for drinking at home particularly useful. This guide offers practical steps and tips to ensure that the collected rainwater is safe for consumption, making it an excellent resource for those looking to reduce their reliance on municipal water sources. By implementing these techniques, you can contribute to a more eco-friendly lifestyle while ensuring access to clean drinking water.
Essential Maintenance: Keeping Your System Running
| Method | Effectiveness | Cost | Time |
|---|---|---|---|
| Boiling | High | Low | 10-20 minutes |
| Water Filtration | High | Medium | Varies |
| Chlorination | High | Low | 30 minutes |
| UV Purification | High | High | 15-30 minutes |
A purification system is only as good as its maintenance. Neglecting it is the fastest way to end up with unsafe water, no matter how good the components are.
Regular Filter Changes
Sediment and carbon filters have a lifespan. They will eventually become clogged and ineffective. Check your manufacturer’s recommendations, but typically, sediment filters need changing every 3-6 months, and carbon filters every 6-12 months, depending on usage and water quality. It’s often better to change them a bit sooner than too late.
UV Lamp Replacement
UV lamps lose their effectiveness over time, even if they are still emitting light. They should be replaced annually. This is critical for the biological safety of your water.
Tank Cleaning and Inspection
As mentioned earlier, aim for at least an annual inspection and cleaning of your storage tank. This removes accumulated sediment that can harbor bacteria and clog filters.
Checking Connections and Seals
Periodically inspect all pipework, connections, and seals for leaks or signs of wear. Even a small leak can compromise the system’s integrity.
Beyond the Basics: Advanced Considerations and Limitations
While purifying rainwater at home is feasible, it’s important to understand its limitations and when you might need to consider professional advice or alternative sources.
Regulatory Compliance and Local Ordinances
In some regions, there may be specific regulations or health codes governing rainwater harvesting for potable use. It’s always a good idea to check with your local authorities to ensure your system complies with any requirements.
Testing Your Water Quality
Even with a well-maintained system, it’s a wise idea to periodically test your purified rainwater. There are home test kits available for common contaminants, or you can send samples to a certified laboratory for comprehensive analysis. This gives you peace of mind and can help identify potential issues you might have missed.
System Scalability and Demand
Consider how much water you actually need. A small system might be fine for a single person or a small family, but larger households with higher water demands might need more robust and potentially more expensive systems.
When to Seek Professional Help
If you live in an area with known significant industrial pollution, very poor air quality, or if you have existing health conditions that make you more susceptible to waterborne illnesses, you might want to consult with a water treatment specialist. They can help design a system tailored to your specific needs and local conditions. It’s also worth considering professional installation if you’re not comfortable with plumbing and electrical work.
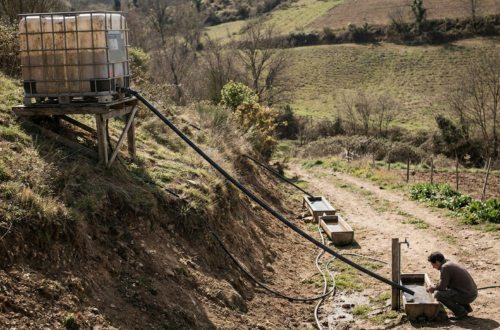
The Role of Power
Many effective purification methods, particularly UV sterilization and pumps, rely on electricity. If you are looking for a completely off-grid solution, you would need to incorporate solar power or other renewable energy sources, which adds complexity and cost. Gravity-fed systems are possible but often less efficient for achieving high levels of purification.
Natural Softness, But Not Necessarily Mineral Rich
While rainwater is naturally soft (meaning it has low mineral content), this doesn’t automatically make it healthier. Some people prefer the taste of water with a bit of mineral content. If you’re concerned about this, there are remineralization filters that can be added to some systems.
Purifying rainwater for drinking at home is a rewarding endeavor that can lead to greater self-sufficiency and potentially lower water bills. By understanding the process, choosing suitable components, performing regular maintenance, and being aware of limitations, you can enjoy clean and safe drinking water directly from the sky.
FAQs
What is rainwater purification?
Rainwater purification is the process of removing contaminants and impurities from rainwater to make it safe for drinking and other household uses.
Why is it important to purify rainwater for drinking?
Rainwater can contain various pollutants, bacteria, and other contaminants that can be harmful if ingested. Purifying rainwater ensures that it is safe for consumption and other domestic uses.
What are the common methods for purifying rainwater at home?
Common methods for purifying rainwater at home include boiling, using a water filter, adding chlorine or iodine, and using a UV purification system.
Is it safe to drink untreated rainwater?
Drinking untreated rainwater can pose health risks as it may contain harmful bacteria, parasites, and other contaminants. It is important to purify rainwater before consuming it.
Are there any potential drawbacks to purifying rainwater for drinking at home?
Some potential drawbacks of purifying rainwater for drinking at home include the need for regular maintenance of purification systems, the initial cost of installing a purification system, and the need to monitor water quality to ensure it remains safe for consumption.