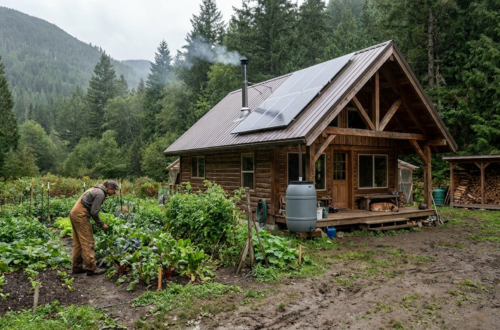
Thinking about going off-grid? Rainwater harvesting is an absolute must-have in your toolkit. Simply put, it’s collecting and storing rain that falls on your property for later use, rather than letting it run off. For off-gridders, this isn’t just a nice-to-have; it’s often your primary water source. It provides self-sufficiency, reduces reliance on potentially unreliable external supplies, and can significantly lower your environmental footprint. Forget about water bills or drought restrictions – when you harvest rain, you’re in control of your water.
Living off the grid means taking responsibility for all your basic needs, and water is arguably the most fundamental. Unlike grid-tied homes that rely on municipal water systems, off-grid properties need a reliable, independent source. This is where rainwater harvesting shines.
Table of Contents
Independence from External Systems
When you’re off-grid, you’re aiming for self-reliance. Tapping into a well can be expensive, require significant energy for pumping, and well water quality can vary or even diminish over time. Hauling water in is a constant, laborious task. Rainwater, on the other hand, literally falls from the sky for free. Once your system is set up, the ongoing costs are minimal, primarily maintenance. This independence means you’re less vulnerable to infrastructure failures, natural disasters affecting public water supplies, or political/economic shifts that could impact water availability or cost. You become your own water utility.
Environmental Benefits
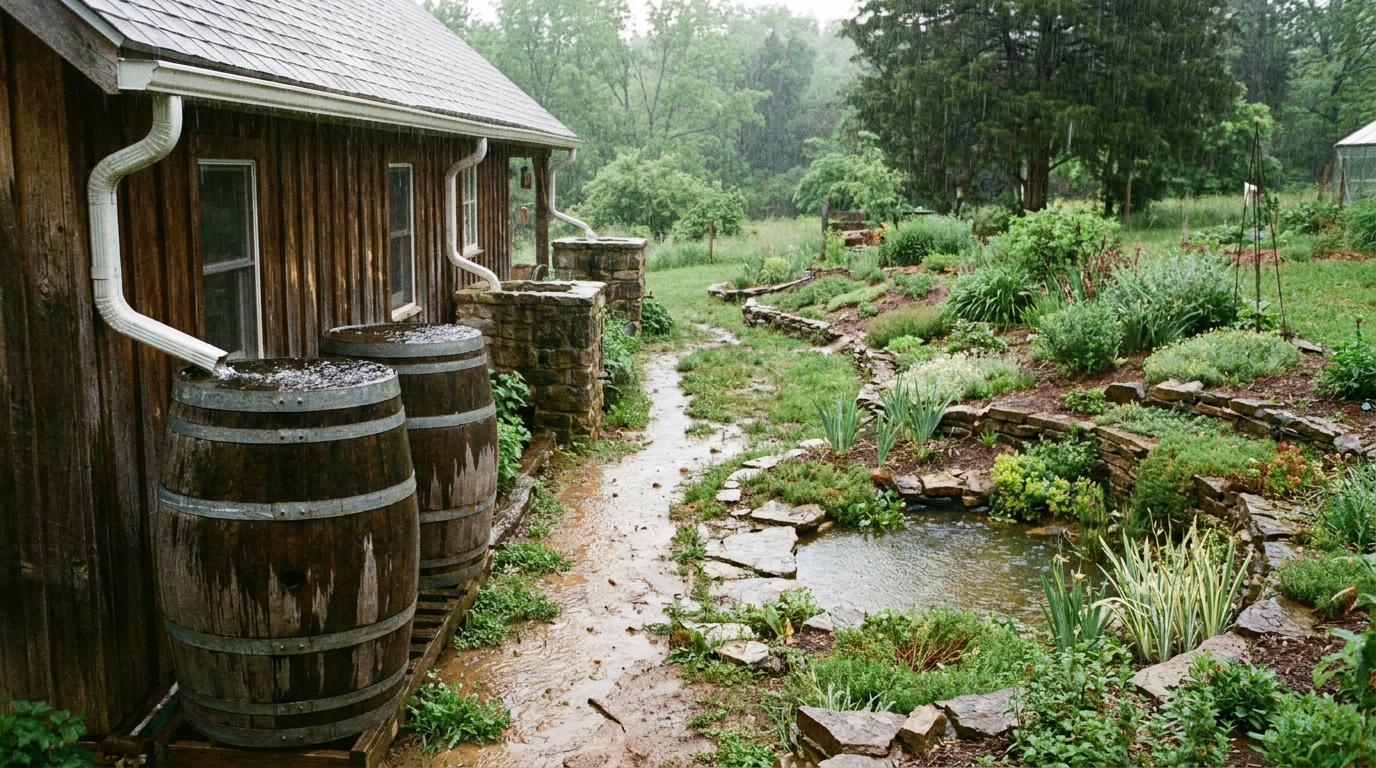
Beyond personal independence, rainwater harvesting is an environmentally friendly choice. It reduces stormwater runoff, which can contribute to erosion and pollution in local waterways. By capturing precipitation on your own land, you’re lessening the burden on local aquifers and natural ecosystems. You’re also potentially reducing the energy consumption associated with treating and pumping water from centralized facilities. It’s a way to participate directly in the natural water cycle on your property.
Water Quality Considerations
While not potable directly without purification, rainwater is generally soft and free of the chemicals like chlorine often found in municipal supplies. It’s excellent for gardening, livestock, flushing toilets, and laundry without further treatment. For drinking and cooking, additional filtration and purification steps are necessary, but the raw input water starts in a relatively clean state compared to many ground or surface water sources. This soft characteristic also means less scale buildup in pipes and appliances, potentially prolonging their lifespan.
For those interested in sustainable living and maximizing their off-grid resources, a related article that delves deeper into the benefits and techniques of rainwater harvesting can be found at this link. This comprehensive guide not only covers the essentials of capturing and storing rainwater but also offers practical tips for integrating these systems into your off-grid lifestyle, ensuring you make the most of your natural resources while promoting environmental sustainability.
Designing Your Rainwater Harvesting System
A well-designed system is key to its effectiveness and longevity. This isn’t a “one size fits all” situation; your specific needs and local climate will heavily influence your choices.
Calculating Your Water Needs
Before you even think about tanks, you need to understand how much water you actually use. This involves a bit of estimation and planning.
- Daily Usage Estimation: Start by adding up your daily water consumption for flushing toilets (around 1.6 gallons/flush), showering (2-5 gallons/minute), laundry (15-45 gallons/load), dishwashing (2-5 gallons by hand, 6-16 gallons for a dishwasher), and drinking/cooking (1 gallon per person). Don’t forget garden needs, livestock, or occasional cleaning. A conservative estimate for one person is often 20-50 gallons per day, but this can vary wildly based on habits.
- Seasonal Fluctuations: Consider how your water needs might change throughout the year. Do you water a large garden in the summer? Have more guests during certain seasons? These factors will impact your total requirements.
- Emergency Buffer: Always aim to have storage capacity that can see you through a dry spell, even one longer than typical. A good rule of thumb is to have enough water for 1-2 weeks of normal usage as a minimum buffer, but more is always better.
Sizing Your Collection Surface
The amount of rain you can collect is directly tied to the size of your collection surface, typically your roof.
- Catchment Area Calculation: Measure the footprint of your roof in square feet (length x width). For a sloped roof, you’ll want to use the projected area, not the actual surface area of the slope, as rain falls straight down.
- Rainfall Data: Research the average annual rainfall for your specific location. This is crucial. Many off-grid guides assume consistent rainfall, but precipitation varies wildly. Look for monthly averages to understand seasonal patterns.
- Runoff Coefficient: Not all rain that hits your roof makes it into your tank. Some is lost to evaporation, splash-out, or absorption. A clean, smooth metal roof might have a runoff coefficient of 0.85-0.95 (85-95% efficiency), while a shingled roof might be 0.75-0.85. For basic calculations, an average of 0.8 (80%) is a reasonable starting point.
- Collection Formula: The general formula is:
Gallons Collected = Catchment Area (sq ft) x Rainfall (inches) x 0.62. The 0.62 factor converts acre-inches of rainfall to gallons. So, for a 1,000 sq ft roof with 1 inch of rain and an 80% efficiency:1000 sq ft x 1 inch x 0.62 x 0.80 = 496 gallons. Multiply this by your average annual or monthly rainfall to get an estimate of your potential collection.
Choosing Your Storage
Storage is where you hold your collected bounty. This is often the most significant upfront cost.
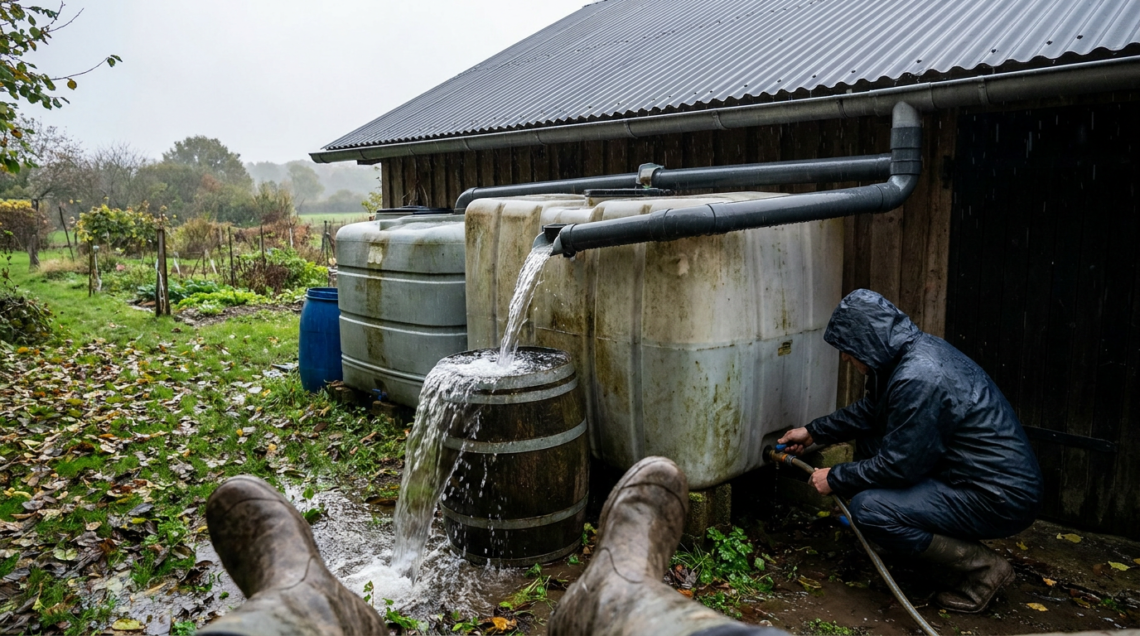
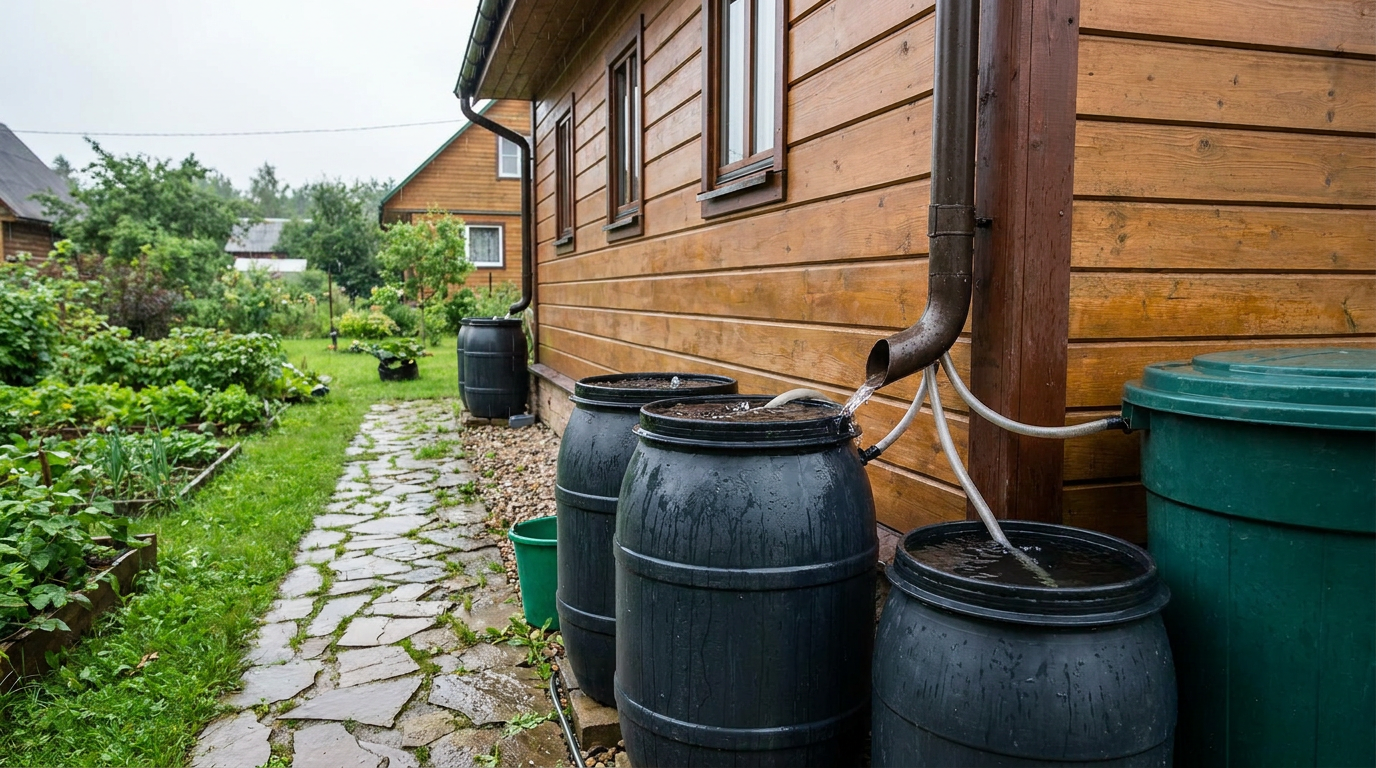
- Above-Ground Tanks: These are generally easier and cheaper to install. Options include polyethylene (plastic) tanks, galvanized steel, or food-grade IBC totes (intermediate bulk containers). They come in various sizes, from a few hundred to tens of thousands of gallons. Placement needs to consider weight (water is heavy!) and aesthetics. They should be opaque to prevent algae growth.
- Below-Ground Cisterns: These can be pre-cast concrete, fiberglass, or plastic. They offer advantages like maintaining a cooler water temperature (reducing evaporation and algae growth), being out of sight, and not taking up yard space. However, they are significantly more expensive and complex to install, often requiring heavy machinery and excavation. They also typically require a pump to get water out.
- Material Considerations: Ensure your chosen material is food-grade if you intend to use the water for drinking. Dark colors or opaque materials are best to block sunlight and prevent algae.
Guttering and Downspouts
These are the unsung heroes of your collection system. Efficiently directing water is paramount.
- Proper Sizing: Gutters and downspouts need to be adequately sized for the maximum anticipated rainfall in your area. If they’re too small, water will overflow during heavy storms, wasting precious resources. A common residential gutter size is 5-6 inches. Downspouts are often 3×4 inches or 4-inch round.
- Screening: Place screens or guards over your gutters to prevent leaves, twigs, and other large debris from entering your system. This minimizes maintenance and keeps your water cleaner.
- Slope: Gutters need a slight slope (about 1/16 to 1/8 inch per foot) towards the downspouts to ensure smooth flow and prevent standing water.
Filtration and Pre-Filtration
Cleaning your water starts at the very beginning of the collection process.
- First Flush Diversion: This is a critical component. The “first flush” of rain washes accumulated dirt, bird droppings, dust, and other contaminants off your roof. A first flush diverter automatically shunts this initial dirty water away from your storage tank, ensuring cleaner water enters your system. These typically consist of a section of vertical pipe that fills with the first few gallons (e.g., 5-10 gallons per 1000 sq ft of roof) before clean water is diverted to the tank.
- Leaf Screens/Basket Filters: Positioned at the top of your tank’s inlet or within the downspout, these provide a secondary level of filtration, catching finer debris that might have made it past the gutter screens. They need regular cleaning.
- Sediment Filters: Before the water enters your home, you’ll want at least one sediment filter (e.g., 20-5 micron) to remove fine particles that have settled or been carried in. These typically go before any pumps to protect them.
Components of a Rainwater Harvesting System
Let’s break down the individual pieces that make up a complete system.
Catchment Surface (Roof)
As discussed, this is your primary collection area. The cleaner and smoother, the better. Asphalt shingles are common but can leach some chemicals; metal roofs are generally preferred for harvesting due to their smoothness and inertness. Ensure your roof is free of lead paints or other hazardous materials, especially if collecting for potable use.
Conveyance (Gutters & Downspouts)
This is how the water travels from your roof to your storage. Ensure they are properly installed, clean, and sloped correctly. Materials like PVC, aluminum, or steel are common.
Pre-Filtration (First Flush & Screens)
These systems prevent large debris and the “first flush” of contaminants from entering your main storage. Regularly inspect and clean screens and first flush diverters.
Storage (Tanks/Cisterns)
Your water reservoirs. Ensure they are sealed, opaque, and vented properly (with insect screens). An access port for cleaning is also vital. Consider multiple tanks linked together for larger capacity or redundancy.
Pumps (Optional, but often necessary)
If your storage tank is not elevated above your usage points, you’ll need a pump to pressurize your system.
- Submersible Pumps: Placed inside the tank, they are quiet and protected from the elements.
- External Pumps: Located outside the tank, easier to access for maintenance but can be noisier and require weather protection.
- Pressure Switches & Accumulator Tanks: These work together to ensure consistent water pressure and reduce pump cycling, prolonging pump life. For off-grid, a DC-powered pump is often preferred if relying on solar.
Post-Storage Filtration for Potable Water
This is crucial if you plan to drink or cook with your harvested rain.
- Sediment Filters: Multi-stage sediment filters (e.g., 50 micron down to 1 micron) remove progressively finer particles.
- Activated Carbon Filters: These remove odors, tastes, and some chemical contaminants (e.g., pesticides, herbicides).
- UV Sterilization: A UV lamp is highly recommended for killing bacteria, viruses, and other pathogens that could be present in rainwater, even after filtration. Ensure proper flow rates for effective sterilization.
- Reverse Osmosis (RO): For the highest level of purification, RO removes dissolved solids, salts, and even smaller contaminants. However, it’s less efficient in terms of water usage (creates wastewater) and often requires higher pressure. It’s usually considered overkill for most general potable rainwater uses unless specific contaminants are a concern.
Distribution System
This is the plumbing that takes your water from storage/pump to your various use points (faucets, toilets, showers). Use standard PEX or copper plumbing.
Installation and Maintenance Tips
A good installation and regular upkeep are what make a rainwater harvesting system truly reliable.
Site Selection and Permitting
- Tank Placement: Consider gravity feed opportunities. If your tank can be higher than your house, you might not even need a pump for some uses. Otherwise, place it as close as practical to where it will be used and where it will receive water from your chosen catchment area. Ensure the ground is level and compacted enough to support the immense weight of a full tank.
- Sunlight: Keep tanks mostly shaded to prevent algae growth and reduce water temperature fluctuations.
- Permitting: While often less regulated than well drilling, check local codes and regulations. Some areas have restrictions or require permits for large water storage.
Best Practices for Installation
- Sturdy Foundations: Water is incredibly heavy (8.34 lbs per gallon!). Tank foundations must be absolutely level and capable of supporting the full weight. A concrete slab or compacted gravel base is usually required.
- Overflow Management: Plan for where excess water will go when your tanks are full. Direct it away from your foundation or into a drainage system.
- Insect Screens: All openings (inlets, overflows, vents) must be screened to prevent mosquitoes and other insects from breeding in your water supply.
- Accessibility for Cleaning: Ensure you can access the inside of your tank for periodic cleaning and the various filter stages for maintenance.
Ongoing Maintenance Regimen
This is not a set-it-and-forget-it system. Regular checks are essential.
- Gutters and Screens: Clean these frequently, especially after heavy storms or during leaf-shedding seasons. Blocked gutters mean wasted water.
- First Flush Diverter: Check and clean the first flush chamber periodically. Sediment can build up at the bottom.
- Tank Inspection: Annually or bi-annually, inspect the inside of your tank for sediment buildup. If significant, you’ll need to drain and clean it. This is why having an access port is crucial.
- Filter Cartridges: Replace sediment and carbon filters regularly based on manufacturer recommendations and water usage. If flow rate drops, it’s often a sign filters are clogged.
- UV Lamp: UV lamps have a finite lifespan (typically 9,000 hours or 1 year of continuous use) and need to be replaced. Also, clean the quartz sleeve surrounding the lamp periodically to ensure maximum UV transmittance.
- Pump Checks: Listen for unusual noises, check for leaks, and periodically verify pressure settings.
For those interested in optimizing their off-grid lifestyle, exploring the intricacies of rainwater harvesting can be incredibly beneficial. A related article that delves into common questions about off-grid living is available, providing valuable insights for beginners. You can check it out for more information on essential practices and tips that complement your rainwater harvesting efforts by visiting this link.
Potential Challenges and Solutions
| Benefits of Rainwater Harvesting | Components | Cost |
|---|---|---|
| Reduces water bills | Rooftop catchment system | Varies based on system size |
| Conserves water resources | Gutters and downspouts | Depends on materials used |
| Provides self-sufficiency | Storage tanks | Initial investment with minimal maintenance |
| Reduces stormwater runoff | First flush diverter | Additional cost for installation |
No system is perfect, and anticipating issues can save you headaches later.
Contamination Risks
- Roof Materials: As mentioned, avoid roofs with lead paint, asbestos, or heavily treated wood shingles if collecting for potable use. New asphalt shingle roofs can leach some chemicals initially; it might be wise to divert the first few rains, or just use that water for non-potable purposes.
- Airborne Pollutants: Industrial areas or regions with heavy agricultural spraying can have more airborne contaminants. If you’re in such an area, more robust filtration might be necessary.
- Animal Waste: Bird and rodent droppings are common. First flush diverters and regular cleaning of gutters help mitigate this.
- Algae Growth: Primarily caused by sunlight hitting water in tanks. Using opaque tanks, keeping them shaded, and treating the water if it’s very persistent (though this isn’t usually necessary with opaque, shaded tanks) are solutions.
Dry Spells and Droughts
- Backup Water Sources: This is where redundancy comes in. Having an emergency well, a connection to a community water source (if available), or the ability to haul in water are good backup plans.
- Conservation: During dry periods, stricter water conservation measures become critical. Shorter showers, efficient appliances, and reduced outdoor watering.
- Increased Storage: The best defense against dry spells is ample storage capacity. Calculate your needs for the longest historical dry period in your area, then add more.
Mosquitoes and Pests
- Screening: Absolutely all openings (inlets, overflows, vents) must be completely sealed with fine mesh insect screen (at least 1/16 inch). This is the primary defense.
- Sealed Tanks: Ensure lids fit tightly and there are no gaps.
- Stand-pipes/First Flush: Keep these drained and dry to prevent standing water where mosquitoes can breed.
System Complexity and Cost
- Start Small: If the initial investment is daunting, you can always start with a smaller, simpler system for non-potable uses (e.g., watering a garden) and expand it later.
- DIY vs. Professional: Many parts of a rainwater system can be DIY, especially the basic collection. However, for large-scale systems, pumps, and specialized filtration (especially potable systems), professional advice or installation can be invaluable to ensure safety and efficiency.
- Resource Allocation: Factor in the initial cost of tanks, pumps, various filters, and plumbing, as well as ongoing maintenance costs (filter replacements, electricity for pumps/UV).
Rainwater harvesting for off-grid living isn’t just about catching water; it’s about establishing a resilient, independent water supply that empowers your self-sufficient lifestyle. By carefully planning, installing, and maintaining your system, you can tap into a virtually endless supply of life-giving water, right from your own roof.
FAQs
What is rainwater harvesting?
Rainwater harvesting is the collection and storage of rainwater for later use. This can be done through various methods such as collecting rainwater from rooftops, storing it in tanks or cisterns, and using it for purposes such as irrigation, drinking water, and household use.
What are the benefits of rainwater harvesting for off-grid living?
Rainwater harvesting provides a sustainable and reliable source of water for off-grid living. It reduces the reliance on traditional water sources, saves money on water bills, and helps conserve natural resources. Additionally, it can be used for various purposes such as gardening, livestock, and even as a backup water supply during emergencies.
What are the different methods of rainwater harvesting?
There are several methods of rainwater harvesting, including rooftop collection, surface water collection, and groundwater recharge. Rooftop collection involves capturing rainwater from the roof of a building and directing it into storage tanks. Surface water collection involves capturing rainwater from the ground surface and directing it into storage systems. Groundwater recharge involves allowing rainwater to percolate into the ground to replenish underground aquifers.
What are the key components of a rainwater harvesting system?
Key components of a rainwater harvesting system include a collection surface (such as a rooftop or catchment area), gutters and downspouts to direct the flow of water, a storage tank or cistern to hold the collected water, a filtration system to remove debris and contaminants, and a distribution system to deliver the water to its intended use.
Are there any considerations or regulations to be aware of when implementing rainwater harvesting for off-grid living?
When implementing rainwater harvesting for off-grid living, it’s important to consider factors such as local climate and rainfall patterns, the size and capacity of the storage system, water quality testing and treatment, and any local regulations or permits that may be required for rainwater harvesting. It’s also important to ensure proper maintenance of the system to keep it functioning effectively.


One comment on “Rainwater Harvesting for Off-Grid Living (Complete Guide)”