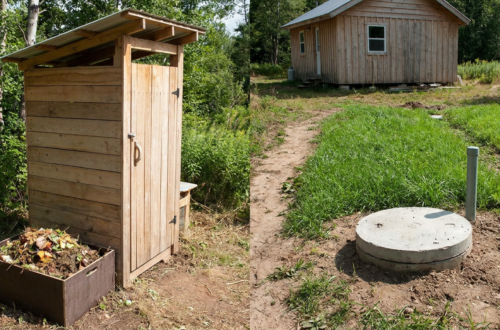
Composting toilets are a fantastic option for off-grid living, RVs, boats, or even just for reducing water usage. But the million-dollar question for many is: How to Empty a Composting Toilet without making a mess or holding your nose for an extended period? It’s simpler than you might think, and with a little preparation and know-how, it’s a manageable and even odor-free process.
Before we dive into the emptying process, it’s crucial to understand what’s actually inside your composting toilet and how it works. This isn’t just a fancy bucket; a well-functioning composting toilet separates liquids and solids, and incorporates material like sawdust or peat moss to aid in decomposition.
Table of Contents
The Two Main Components: Solids and Liquids
Most composting toilets operate on a two-chamber system.
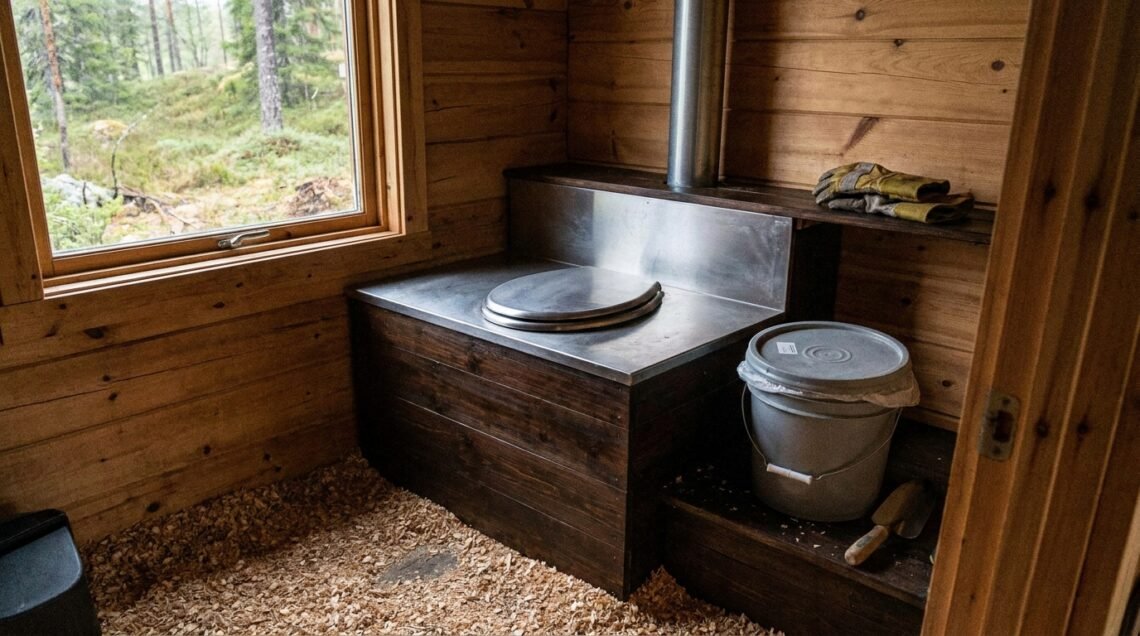
Solids Chamber: The “Compost” Part
This is where your… well, your solids go. The key here is that the toilet is designed to keep these solids contained and allow them to begin the composting process. They are mixed with a bulking agent (like sawdust or coco coir) which absorbs moisture, reduces odor, and provides the carbon source needed for decomposition. The goal is for the solids to break down into a dry, relatively odorless material over time. You’re not typically emptying fresh human waste directly; it’s waste that has undergone a period of drying and initial breakdown.
Liquids Chamber: The “Urine Diverter”
This is essentially a fancy way of saying it collects urine. Urine is sterile and can be a valuable nutrient source for plants, but it needs to be managed separately. If left to mix with solids in a composting toilet, it can create excess moisture, leading to anaerobic decomposition, bad smells, and a less effective composting process. This is why urine diversion is so important for odor control and efficient composting.
What Happens Before Emptying?
The composting toilet doesn’t magically turn waste into finished compost overnight. There’s a process involved.
The Drying and Decomposition Phase
For the solids chamber, the bulking agent plays a starring role. As you add waste and cover it with more bulking agent, the material begins to dry out. This is a crucial step in preventing odors. Over time, the microbial activity starts to break down the organic matter. The duration of this phase depends on how often the toilet is used and the specific model. Some systems have a “secondary” composting chamber where solids can rest for a longer period before emptying.
The “RIPE” Indicator
Many composting toilets will have some kind of indicator that the solids are ready to be emptied. This might be a physical inspection of the material (it should look dry and crumbly, not wet and slimy) or a specific timeframe recommended by the manufacturer. Don’t rush the process; let nature do its work!
If you’re looking to enhance your off-grid living experience, understanding how to manage your waste effectively is crucial. In addition to learning about how to empty a composting toilet safely, you might find it beneficial to explore the energy needs of your off-grid setup. For instance, you can read about the essential considerations for solar power systems in the article on how many batteries you need for off-grid solar. This resource can help you ensure that your composting toilet and other systems function smoothly without compromising your energy supply. Check it out here: How Many Batteries Do You Need for Off-Grid Solar?.
Empting the Liquids Chamber: A Quick and Easy Win
This is the part that most people worry about, but it’s genuinely the simplest and most frequently needed task. Emptying the liquids tank is typically a weekly or bi-weekly affair, depending on usage and the size of the tank.
Locating and Accessing the Liquids Tank
Your composting toilet will have a specifically designed tank or bottle for urine.
Finding the Inlet
Most urine diverter systems have a small opening or funnel that directs urine into a separate container. This container is usually accessible from the outside of the toilet unit or from underneath. Consult your toilet’s manual if you’re unsure of its exact location.
Easy Removal
Once you’ve located the tank, it should be designed for easy removal. It might slide out, unclip, or have a simple handle. The goal of the design is to minimize any potential for spills or contact with the contents.
The Actual Emptying Process
This is where practicality meets necessity.
Where to Pour the Urine
This is the most common question, and it’s quite straightforward.
For Garden Use: Dilution is Key
Urine is rich in nitrogen and can be a fantastic fertilizer for plants. However, it’s potent and needs to be diluted. A good rule of thumb is a 1:10 ratio of urine to water. Use a watering can or hose to apply it directly to the soil around non-edible plants. Avoid pouring it directly onto the roots or leaves, which can cause burning.
For Disposal: Check Local Regulations
If you don’t have a use for the diluted urine in your garden, you’ll need to dispose of it where it won’t cause problems. In many areas, diluting it with water and pouring it down a standard toilet or into a public sewer system is acceptable. However, always check your local regulations. Some areas might have specific rules about liquid waste disposal, especially in RV parks or campgrounds. Never pour undiluted urine directly into the environment.
Cleaning the Liquids Tank
After emptying, a quick rinse is a good idea.
Using Water and Mild Soap
A simple rinse with water is often sufficient. If you notice any lingering odor or residue, a mild soap can be used, followed by a thorough rinse to ensure no soap remains. Avoid harsh chemicals or bleach, as these can damage the tank material and are unnecessary for this part of the process.
Empting the Solids Chamber: The “Main Event”
This is the task that requires a bit more planning and care, but it’s far less daunting than many imagine. The frequency of emptying the solids chamber depends heavily on the size of the toilet, the number of users, and how well the composting process is working. It could range from once every few months to once or twice a year.
Preparing for Solids Removal
A little preparation goes a long way in making this process smooth and(dare we say it)even pleasant.
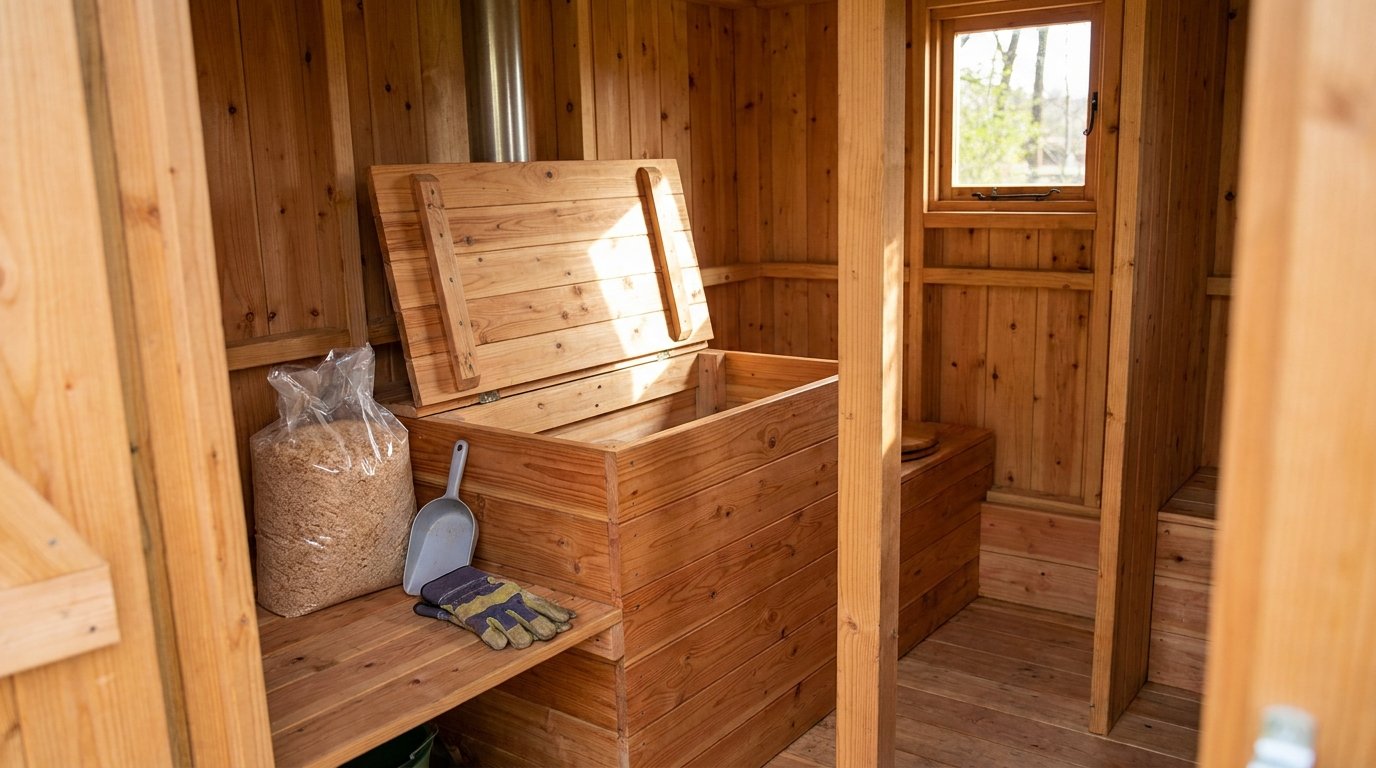
Gathering Your Supplies
You’ll need a few things on hand before you start.
Gloves: Non-Negotiable
Always wear sturdy, disposable gloves. Medical or gardening gloves work well. This is your primary barrier against direct contact.
Mask: Optional but Recommended
If you’re particularly sensitive to odors, a simple face mask can make a big difference. It’s not usually necessary for most people with a well-functioning, dry composting toilet, but it’s a good backup.
Dedicated Tools
Have a small shovel, trowel, or scoop specifically for this task. You don’t want to use tools that will be used for food preparation.
A Suitable Container
This is probably the most important item. You need a sturdy, sealable container to transport the composted material.
Buckets or Bags
For transport and eventual dispersal. Heavy-duty garbage bags or sturdy buckets with lids are ideal.
Water Source and Bucket
For rinsing.
Understanding the State of the Solids
What you’re emptying isn’t raw sewage.
Dry and Crumbly
A well-performing composting toilet will produce solids that are dry and crumbly, with a mild earthy odor – like forest floor or damp soil.
What to Do if it’s Wet
If the solids are wet and sludgy, it indicates a problem with moisture management, possibly too much urine entering the solids chamber, insufficient bulking agent, or poor ventilation. In this case, you might need to add more dry bulking agent and let it dry out for longer before attempting to empty.
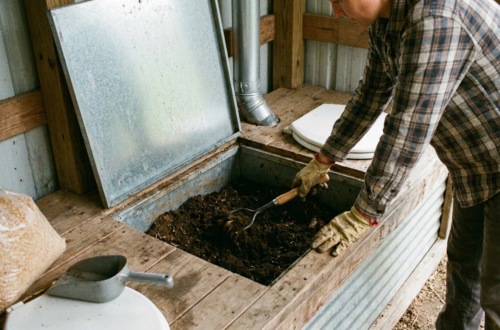
The Removal Process
This is where you get your hands (gloved hands, of course) dirty.
Accessing the Solids Drawer or Chamber
Composting toilets are designed with this in mind.
Sliding Out the Drawer
Many units have a pull-out drawer or tray where the solids accumulate. Gently pull this out.
Unlatching the Chamber
Some larger units might have a hinged chamber that unlatches for access. Always refer to your toilet’s manual for specific instructions.
Transferring the Composted Material
This requires a bit of finesse.
Gently Scooping
Use your dedicated scoop or trowel to carefully scrape and scoop the dried material into your prepared container. Try not to create too much dust.
Breaking Up Clumps
If there are any larger clumps, you can gently break them up with your scoop.
Sealing the Container
Once you’ve transferred the material, securely seal the container. This is crucial for odor control during transport.
Where Does the Composted Material Go?
This is the satisfying part – turning waste into a resource.
The End Goal: Finished Compost
If your toilet has been managed correctly, the material you’re emptying is not finished compost in the gardening sense, but it’s well on its way. It’s essentially a dried, partially decomposed mixture.
The Role of Further Composting
For true finished compost, you’ll typically need to let this material further decompose in a dedicated compost pile or bin for an extended period (often 6 months to a year or more), depending on your climate and the stage of decomposition when you emptied it.
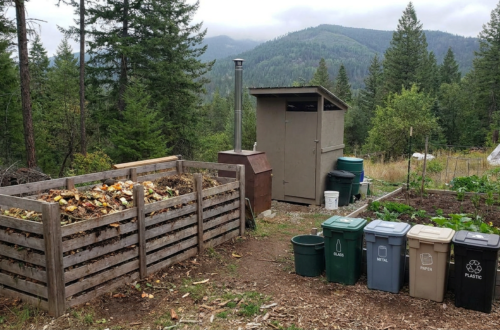
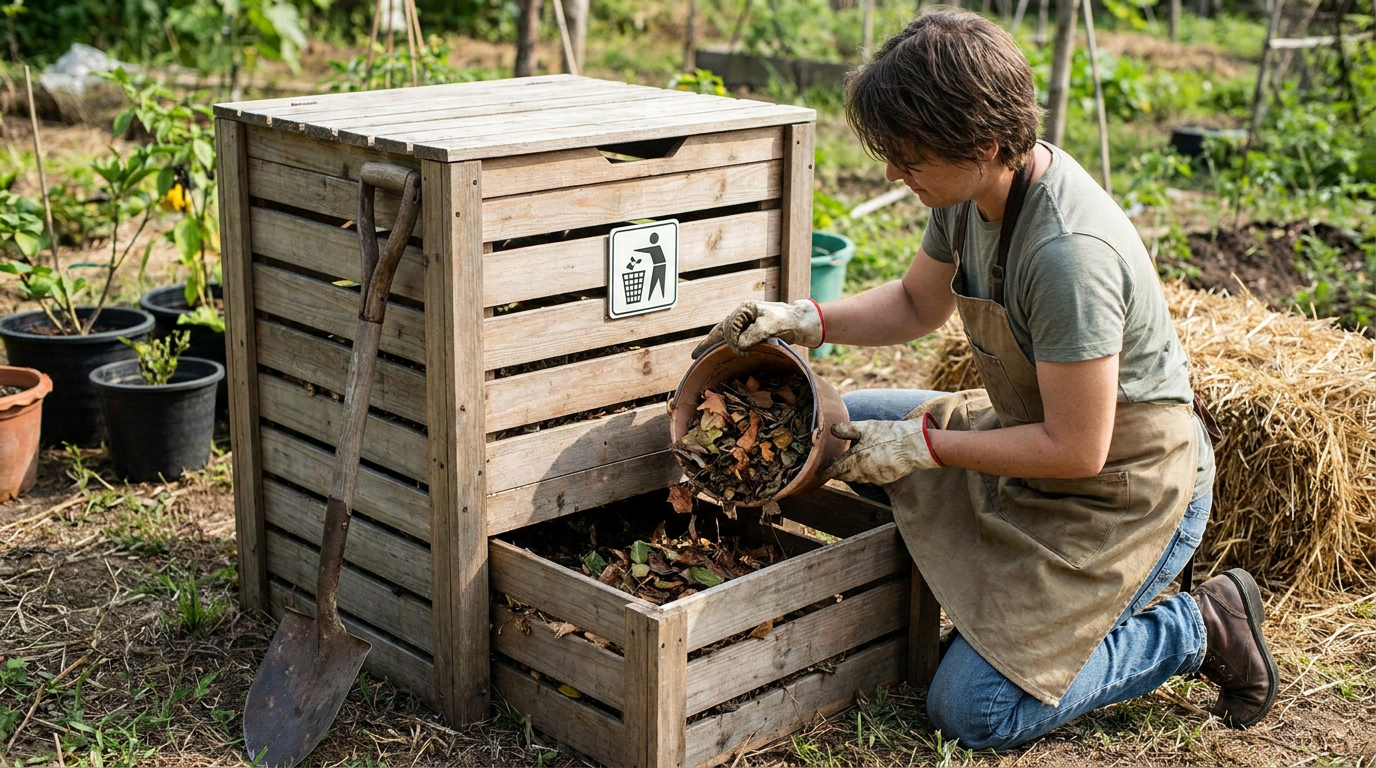
Adding to a Dedicated Compost Pile
This is the most common and recommended method. Your emptied solids can be added to an existing outdoor compost bin. Mix it in with other organic materials like leaves, grass clippings, and kitchen scraps.
Considerations for Finished Compost
The finished product will be a dark, crumbly, and odorless material that is excellent for enriching your garden soil. You can use it for ornamental plants, trees, and shrubs. Many experts recommend not using it on edible gardens, especially root vegetables, to err on the side of caution regarding pathogen reduction, although with proper composting, risks are significantly reduced.
Alternative Disposal Methods
If a dedicated compost pile isn’t an option, or if you’re in a transitional phase.
Burial
In some remote areas or for temporary situations, the composted material can be buried in a hole at least 18-24 inches deep. This also allows for further decomposition by soil microbes. Ensure it’s a location where it won’t impact water sources.
Municipal Composting Facilities
Some larger composting facilities may accept pre-composted humanure, but this is less common and requires specific arrangements and knowledge of their acceptance criteria.
If you’re looking to maintain a sustainable lifestyle, understanding how to manage waste is crucial, and learning how to empty a composting toilet safely is an important step. For those interested in the broader implications of off-grid living, including the legal aspects that come with it, you might find this article on off-grid living laws particularly insightful. It provides essential information that complements your journey towards a more self-sufficient lifestyle.
Maintaining Your Composting Toilet Between Emptyings
| Step | Description |
|---|---|
| 1 | Turn off the ventilation fan to prevent any odors from escaping. |
| 2 | Put on gloves and a mask to protect yourself from any potential bacteria. |
| 3 | Open the composting toilet compartment carefully. |
| 4 | Use a designated composting toilet waste container to collect the waste. |
| 5 | Seal the waste container tightly to prevent any leakage. |
| 6 | Dispose of the waste in a designated composting area or facility. |
| 7 | Clean the composting toilet compartment thoroughly with a disinfectant. |
| 8 | Dispose of gloves and mask properly and wash your hands thoroughly. |
Regular maintenance is key to a pleasant experience with your composting toilet, both for daily use and for those less frequent emptying tasks.
The Importance of Bulking Agent
This is your secret weapon against odor.
Regularly Topping Up
After each use of the solids chamber, or at least once per day, add a generous scoop of your chosen bulking agent (sawdust, coco coir, peat moss) to the solids. Stir it in gently. This ensures that moisture is absorbed and odors are suppressed.
Using the Right Kind of Bulking Agent
Fine sawdust is generally preferred as it mixes well and has good absorptive properties. Avoid treated lumber or very coarse wood chips.
Ensuring Proper Ventilation
Good airflow is critical for the aerobic decomposition process.
Checking the Vent Pipe
Most composting toilets have a vent pipe that exhausts air from the solids chamber to the outside. Ensure this pipe is not blocked by debris or snow.
Fan Operation (if applicable)
Some models have a small, low-power fan to assist with ventilation. Make sure it’s operating correctly.
Managing Moisture Levels
Striking the right balance is key.
Keeping Solids Dry
The primary goal is to keep the solids as dry as possible. If you notice excessive moisture, add more bulking agent.
Addressing Urine Overflow
If the urine diverting mechanism seems to be malfunctioning or if the liquids tank is filling too quickly, investigate the cause.
Safety and Hygiene Considerations
While composting toilets are generally safe and hygienic when used correctly, a few points are worth reinforcing.
Personal Hygiene Practices
This is the most straightforward way to ensure a healthy environment.
Hand Washing
Always wash your hands thoroughly with soap and water after handling any part of the composting toilet, including emptying and refilling the bulking agent.
Using Gloves
As mentioned, always wear gloves when physically interacting with the contents of the solids chamber.
Understanding Pathogen Reduction
It’s a common concern.
The Role of Drying and Time
The primary factors in reducing pathogens in composting toilets are the drying process, the aerobic decomposition, and the time the material spends in the system or in a dedicated compost pile.
Aerobic vs. Anaerobic Decomposition
Aerobic decomposition (with oxygen) is the goal. It produces drier material and fewer harmful bacteria compared to anaerobic decomposition (without oxygen), which can lead to foul odors and a higher risk of pathogens.
Time as a Factor
The longer the material composts, the more time pathogens have to break down. This is why long-term composting is crucial for creating safe-to-use garden amendments.
Environmental Considerations
Responsible disposal is paramount.
Preventing Water Contamination
Never dispose of waste where it could contaminate groundwater or surface water sources. Always follow local regulations and best practices.
Minimizing Odors
A well-maintained composting toilet should not produce significant odors that would be considered a nuisance to neighbors or the environment. Consistent use of bulking agent and proper ventilation are key.
Learning to empty a composting toilet is a fundamental skill for anyone using one. While it might seem intimidating at first, by understanding the process, preparing adequately, and maintaining your unit, you can manage this task safely, hygienically, and with minimal fuss. It’s a small part of the larger reward of sustainable living and resourcefulness that composting toilets offer.
FAQs
What is a composting toilet?
A composting toilet is a type of toilet that uses the natural process of decomposition to break down waste into compost. It is a sustainable and environmentally friendly alternative to traditional flush toilets.
How do you empty a composting toilet safely?
To empty a composting toilet safely, it is important to wear gloves and a mask to protect yourself from any potential pathogens. Use a designated composting area or facility to dispose of the waste, and follow the specific instructions provided by the manufacturer of your composting toilet.
What are the potential risks of emptying a composting toilet?
The potential risks of emptying a composting toilet include exposure to pathogens and bacteria present in the waste. It is important to take proper precautions and follow safety guidelines to minimize the risk of contamination.
Can compost from a composting toilet be used as fertilizer?
Yes, the compost produced from a composting toilet can be used as fertilizer. However, it is important to ensure that the compost has fully decomposed and is free from any potential pathogens before using it in your garden or for agricultural purposes.
Are there any regulations or guidelines for emptying composting toilets?
Regulations and guidelines for emptying composting toilets may vary depending on your location. It is important to check with local authorities or environmental agencies to ensure that you are following the proper procedures for emptying and disposing of waste from a composting toilet.