So, you’re wondering how to store food long-term, without needing to plug anything in? It’s a pretty handy skill to have, whether you’re thinking about emergencies, want to cut down on waste, or just enjoy a bit of self-sufficiency. The good news is, there’s a whole bunch of ways to do it, and most of them are surprisingly straightforward. We’re talking about methods that have been used for centuries, relying on nature and a bit of know-how rather than fancy gadgets.
The core idea behind long-term food storage without refrigeration is to create an environment where the things that cause food to spoil – like moisture, oxygen, and microorganisms – just can’t do their thing. Think of it like preserving something in a protective bubble. Different methods tackle different spoilage culprits, so the best approach often involves a combination of techniques. Let’s dive into some of the most reliable ways to keep your food fresh and safe, long after it’s left the grocery store or your garden.
Drying food is probably one of the oldest and most effective methods of preservation. It works by removing water, which is essential for bacteria, mold, and yeasts to grow. When you dry food properly, you essentially create an environment where these spoilage agents can’t survive. It’s simple, requires minimal equipment, and can be done with a wide variety of foods.
Table of Contents
Sun Drying
This is the classic method, using the sun’s natural power. It’s best suited for warmer, drier climates with plenty of sunshine and low humidity.
- What works best: Fruits like apples, apricots, grapes (for raisins), and tomatoes are prime candidates. Thinly sliced vegetables like peppers, onions, and zucchini can also be dried this way. Herbs are also perfect for sun drying.
- How to do it:
- Preparation: Wash and slice your produce thinly and uniformly. Thicker pieces won’t dry evenly and can lead to spoilage. For fruits, you can consider a brief blanching in boiling water or a citric acid solution to preserve color and prevent enzyme action.
- Arrangement: Spread the food in a single layer on clean trays, screens, or even clean cloth. Ensure good air circulation around each piece. Elevated racks are ideal.
- Protection: This is crucial. You need to protect your food from insects, birds, and dust. Fine mesh screens or cheesecloth are your friends here. If you’re in an area with dew or sudden rain, you’ll need a way to bring your food inside or cover it.
- Drying Time: This can take anywhere from a few days to a week or more, depending on the food, temperature, humidity, and airflow. The food is dry when it’s leathery and no longer feels moist to the touch. For fruits, it should be pliable but not sticky. For vegetables, it should be brittle.
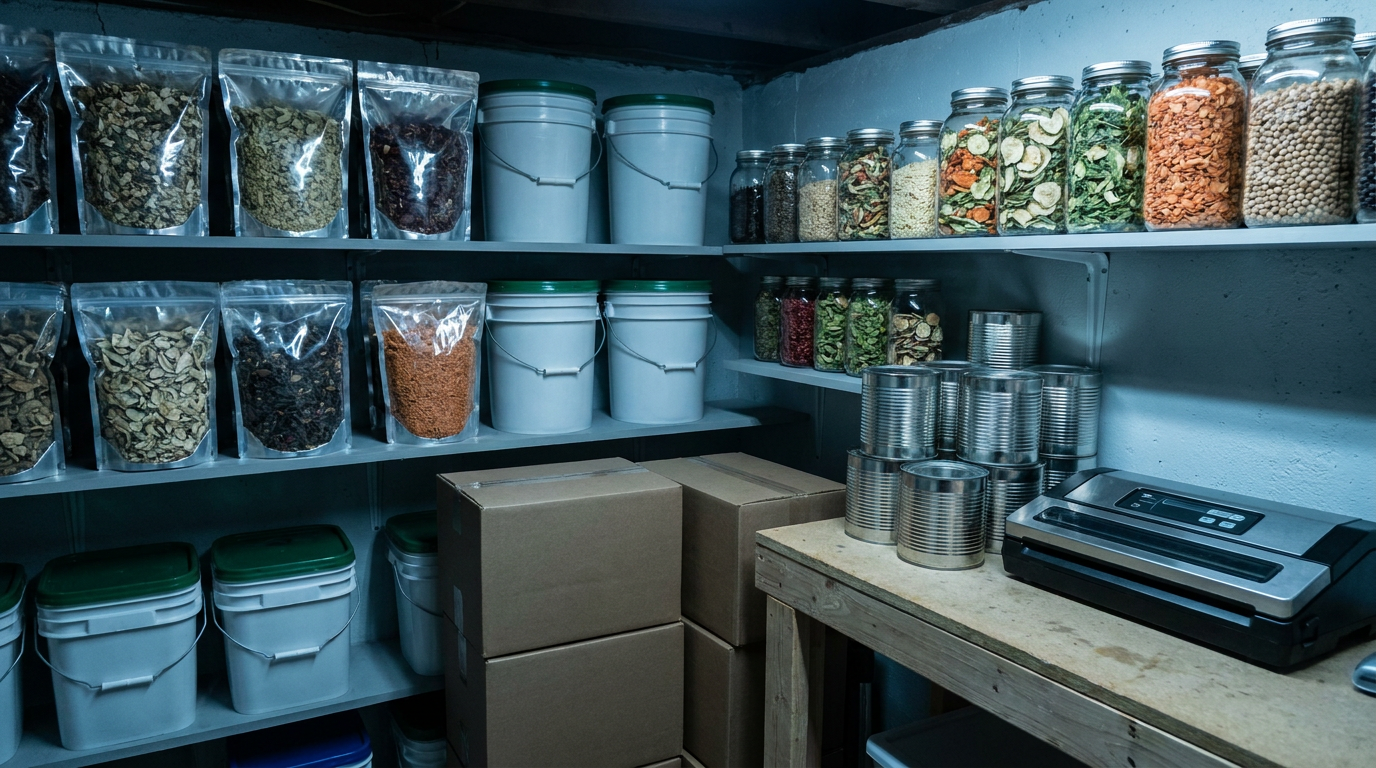
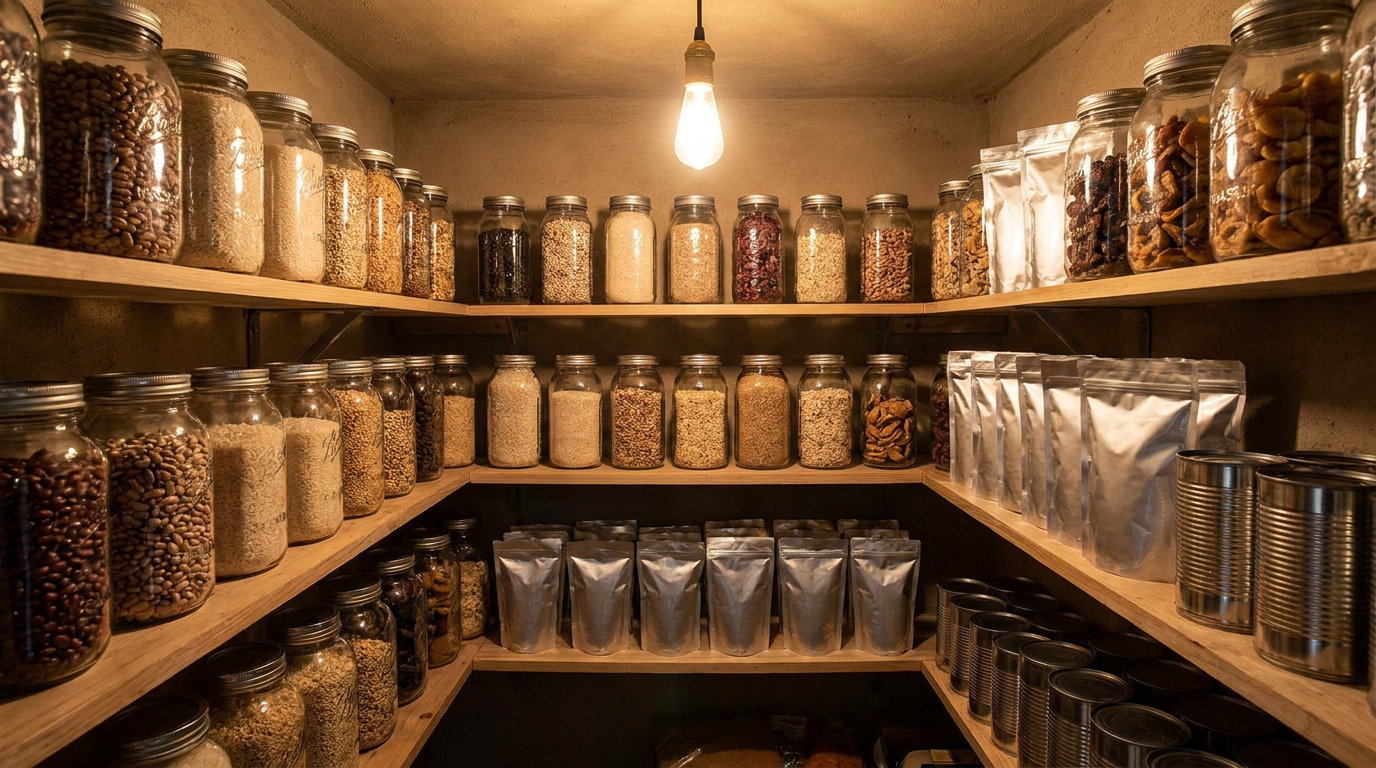
- Storage: Once completely dry, cool the food down. Then, store it in airtight containers like glass jars, Mylar bags, or food-grade plastic containers. Store in a cool, dark, dry place.
Dehydrator Drying
If you don’t have consistently sunny weather or want more control and speed, an electric food dehydrator is an excellent option. These machines provide consistent heat and airflow, making the drying process much more predictable.
- Benefits: Faster drying times, less risk of insect contamination, works regardless of weather, preserves more nutrients and color compared to sun drying.
- How to use: Similar preparation to sun drying – wash, slice thinly and uniformly. Arrange food in a single layer on the dehydrator trays. Follow the manufacturer’s instructions for temperature and drying times, which vary by food type.
- Checking for dryness: The food should be leathery or brittle, depending on the type, and no longer sticky or pliable.
Oven Drying
Your oven can be a makeshift dehydrator, though it’s less energy-efficient and can be harder to control the temperature precisely.
- Settings: Use the lowest possible heat setting on your oven, typically between 130-160°F (54-71°C). If your oven doesn’t go that low, you might need to prop the door open slightly with a wooden spoon to prevent it from getting too hot and cooking the food.
- Process: Similar slicing and single-layer arrangement on baking sheets lined with parchment paper. Rotate trays periodically if necessary for even drying.
- Considerations: This method uses a lot of energy and takes up your oven space, so it’s best for smaller batches or when other methods aren’t feasible.
Canning: Sealing in the Goodness
Canning is a fantastic way to store a wide variety of foods, preserving them in airtight jars. It involves heating the food and jars to a temperature that destroys spoilage microorganisms and then sealing them to prevent recontamination. This method is great for fruits, vegetables, meats, and even full meals.
Water Bath Canning
This method is suitable for high-acid foods, which are naturally more resistant to bacterial growth.
- What it’s for: Fruits, pickles, jams, jellies, and most fruit juices.
- Equipment: Canning jars (Mason jars are standard), lids, rings, a large pot (canner) with a rack, tongs, and a headspace tool (or ruler).
- The Process:
- Preparation: Wash jars thoroughly and sterilize them. Prepare your food according to a tested recipe.
- Filling Jars: Pack food into hot jars, leaving the recommended headspace (the space between the food and the lid). Wipe rims clean before applying lids and rings.
- Processing: Place filled jars on the rack in your canner, ensuring they are not touching each other or the sides of the pot. Add hot water to cover the jars by at least 1-2 inches. Bring the water to a rolling boil and process for the time specified in your tested recipe.
- Cooling: Carefully remove jars from the canner and place them on a towel-lined counter to cool undisturbed for 12-24 hours. You’ll hear a “ping” sound as the lids seal.
- Checking Seals: After cooling, check that the lids are firmly down and have not popped up. Remove the rings for storage; they can trap moisture and cause rust.
- Safety is Key: Always use tested recipes from reliable sources like the National Center for Home Food Preservation (NCHFP) or Ball canning guides. Improper canning of low-acid foods can lead to botulism, a serious risk.
Pressure Canning
This method is essential for low-acid foods because it reaches temperatures high enough to kill Clostridium botulinum spores, the bacteria responsible for botulism.
- What it’s for: Vegetables, meats, poultry, fish, beans, and most soups.
- Equipment: A pressure canner is required – a specialized pot that can build up steam pressure. Jars, lids, and rings are the same as for water bath canning.
- The Process:
- Preparation: Similar to water bath canning, prepare your food and jars. Low-acid foods generally don’t require as much pre-treatment as acidic foods.
- Filling Jars: Pack food into hot jars, leaving the recommended headspace (often slightly more for raw-packed food). Wipe rims and apply lids and rings.
- Pressure Cooking: Place jars in the pressure canner with the recommended amount of water. Follow your canner’s instructions for venting, bringing it up to the correct pressure (measured in pounds per square inch, psi), and maintaining that pressure for the specified processing time. This is where the higher temperature is achieved.
- Cooling: Once processing is complete, allow the canner to depressurize naturally. Do not force-cool it. Remove jars and let them cool undisturbed for 12-24 hours.
- Strict adherence: Pressure canning requires very precise following of tested recipes and your pressure canner’s instructions. Incorrect pressure or processing time can be dangerous.
Fermentation: Harnessing Beneficial Microbes
Fermentation uses the power of beneficial bacteria and yeasts to preserve food and create unique flavors. These microbes consume sugars in the food and produce acids, alcohol, or gases, which inhibit the growth of spoilage organisms. It’s a living process that adds probiotics to your diet.
Lacto-fermentation
This is the most common type of fermentation for vegetables. Lactic acid bacteria are naturally present on the surface of vegetables and, in the absence of oxygen and with the right salt concentration, they thrive.
- What works best: Cabbage (for sauerkraut), cucumbers (for pickles), carrots, beets, radishes, and a variety of other vegetables.
- The Basic Process:
- Preparation: Wash and prepare your vegetables (shred, slice, chop).
- Brine: Create a brine solution. For most vegetables, this is simply salt and water. The salt draws water out of the vegetables, creating its own juices, and also controls the fermentation by favoring lactic acid bacteria over spoilage microbes. A common ratio is 2-3 tablespoons of non-iodized salt per quart (liter) of water.
- Packing: Pack vegetables tightly into clean jars or crocks. Submerge the vegetables completely in the brine. You might need to use a fermentation weight to keep them down.
- Anaerobic Environment: Crucially, the fermentation needs to be anaerobic (without oxygen). This prevents mold from forming on the surface. Use airlocks, fermentation lids, or ensure the brine covers the vegetables by at least an inch.
- Fermenting: Leave the jars/crocks at room temperature (ideally 60-75°F or 15-24°C) for a period, typically 1-4 weeks, depending on the desired flavor and temperature. You’ll see bubbles, which is a sign of active fermentation.
- Tasting and Storage: Taste periodically. Once it reaches your desired level of sourness, remove any weights and airlocks. Ensure there’s still enough brine to cover the vegetables, or add a little more brine. Seal the jars tightly and store them in a cool place, like a cellar or refrigerator. They will continue to ferment slowly in cool storage.
Other Fermented Foods
- Yogurt: Made by fermenting milk with specific bacterial cultures.
- Kefir: A fermented milk drink made with kefir grains.
- Kombucha: A fermented tea drink.
While these are often consumed fresh or stored in the refrigerator, the initial fermentation process itself is a preservation method. Understanding the principles of beneficial bacteria is key.
Freezing: Cold Storage Champion
While the question is about storing food without refrigeration, it’s worth briefly mentioning freezing as a very common and effective method. Refrigeration preserves food by slowing down spoilage. Freezing, on the other hand, effectively stops microbial activity and enzymatic processes by lowering the temperature to below 0°F (-18°C).
- How it works: Freezing inactivates most bacteria and prevents them from multiplying. It also significantly slows down the chemical reactions that cause food to degrade.
- Considerations for long-term storage:
- Packaging: Proper packaging is paramount to prevent freezer burn. Use airtight, moisture-proof containers or bags designed for freezing. Remove as much air as possible.
- Blanching: Many vegetables need to be blanched (briefly boiled and then plunged into ice water) before freezing to deactivate enzymes that would otherwise degrade their quality over time.
- Cooling: Cool hot foods completely before freezing.
- Freezer Temp: Ensure your freezer is set to at least 0°F (-18°C) and stays at that temperature consistently.
- Refrigeration vs. Freezing: While freezing is a form of cold storage, it relies on electricity to maintain the low temperature. This article focuses on methods that don’t depend on continuous power.
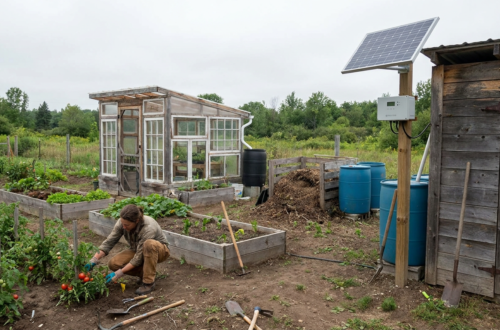
If you’re interested in learning more about sustainable living practices, you might find the article on the cheapest way to start off-grid living particularly useful. It provides insights into various strategies for reducing reliance on modern conveniences, including effective methods for food preservation. Understanding how to store food long-term without refrigeration can complement your off-grid lifestyle, ensuring you have access to nutritious meals while minimizing waste.
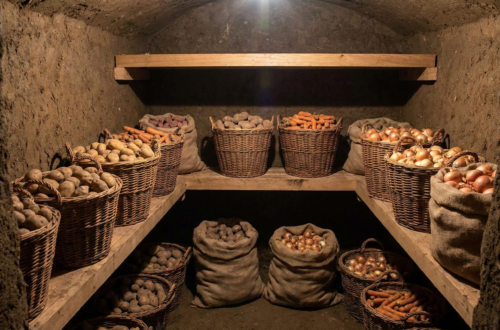
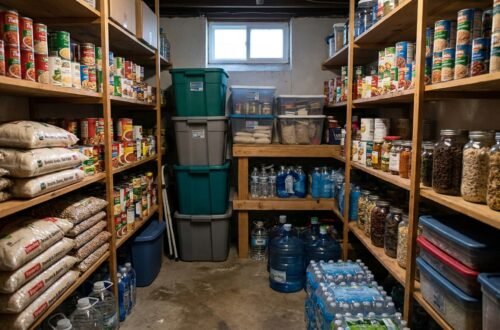
Root Cellaring: The Natural Larder
| Food Item | Storage Method | Estimated Shelf Life |
|---|---|---|
| Rice | Store in a cool, dry place in an airtight container | 4-5 years |
| Dried Beans | Store in a cool, dry place in an airtight container | 2-3 years |
| Honey | Store in a cool, dry place in a sealed container | Indefinite |
| Dried Pasta | Store in a cool, dry place in an airtight container | 1-2 years |
| Canned Goods | Store in a cool, dry place | 2-5 years |
Root cellaring is an age-old method of storing produce that relies on creating a stable, cool, humid environment. Think of it as a natural, underground refrigerator. Historically, this was done in dug-out cellars, basements, or specially constructed rooms.
- Ideal Conditions: The key is to maintain:
- Cool Temperatures: Ideally between 32-40°F (0-4°C).
- High Humidity: Around 85-95%. This prevents produce from drying out.
- Darkness: Darkness inhibits sprouting and preserves quality.
- Good Ventilation: Slow air circulation prevents the buildup of ethylene gas from ripening produce, which can cause other items to spoil faster.
- What Stores Well:
- Root Vegetables: Potatoes, carrots, parsnips, beets, turnips, rutabagas.
- Winter Squash and Pumpkins: Need to be cured first (dried in a warm place for a week or two).
- Onions and Garlic: Need drier conditions than root vegetables, so often stored separately.
- Apples: Can store for months if kept cool and humid.
- How to Create a Root Cellar (or simulate one):
- Basement: Many basements provide naturally cool and somewhat humid conditions. You can create sections using shelves and bins.
- Canning Jars: For some items, like pickled beets or fermented carrots, canning and then storing them in a cool, dark area simulates the preservation provided by a root cellar.
- Coolest Room: Identify the coolest, darkest spot in your home, perhaps a closet on the north side of a building.
- Humidity Control: For items that need high humidity, you can place bins of produce in larger bins filled with damp sand or sawdust. For items that prefer drier conditions (like onions and garlic), ensure they have good air circulation and aren’t packed too tightly.
- Preparation for Storage:
- Don’t Wash: Generally, don’t wash root vegetables before storing them. Brush off excess dirt, but leave the skin intact. Washing can remove protective layers and encourage rot.
- Curing: Winter squash and pumpkins need to be cured to harden their rinds and extend their shelf life.
- Separation: Store different types of produce separately, as some emit gases that can affect others (e.g., apples and potatoes).
When considering methods for preserving food without refrigeration, it’s also important to understand the broader implications of living off the grid. For those interested in this lifestyle, exploring the legal aspects can be quite enlightening. You might find the article on off-grid living laws particularly useful, as it provides essential information that complements your efforts in long-term food storage. Understanding these regulations can help ensure that your sustainable practices align with local laws while you enjoy the benefits of self-sufficiency.
Sealing with Oil: Encasing to Protect
Submerging food in oil creates a barrier that prevents oxygen from reaching the food, thus inhibiting the growth of aerobic spoilage microorganisms. This method is particularly useful for preserving cooked foods, herbs, and some vegetables.
Preserving in Oil
This is a simple but effective technique for extending the life of certain foods.
- What works best:
- Cooked Vegetables: Roasted or grilled vegetables like peppers, tomatoes, and artichoke hearts.
- Herbs: Fresh herbs can be chopped and covered with oil to preserve their flavor.
- Cheese: Some cheeses (especially hard cheeses) can be stored in oil.
- Sun-Dried Tomatoes: A classic example of food preserved in oil.
- The Process:
- Preparation: Ensure the food is prepared as desired (cooked, chopped, etc.) and completely dry. Moisture is the enemy here and can lead to bacterial growth.
- Container: Use clean, sterile jars or containers.
- Submerging: Place the food in the container and pour good quality oil (olive oil, vegetable oil, etc.) over it, ensuring the food is completely submerged. Use a spoon or spatula to push down any air bubbles.
- Sealing: Seal the container tightly.
- Storage: Store in a cool, dark place. For optimal safety and longevity, especially with herbs, it’s often recommended to store them in the refrigerator after the initial period or if you’re concerned about spoilage. Eating foods preserved in oil from room temperature storage requires careful attention to spoilage signs (off smells, mold). Using very fresh, high-quality oil and ensuring the food is completely dry is crucial for safety.
Considerations for Safety when Using Oil
- Botulism Risk: While oil prevents aerobic bacteria, anaerobic bacteria (like Clostridium botulinum) can still grow in an oxygen-free environment if the food is not properly handled or if there’s a risk of contamination. This is a particular concern with garlic-in-oil preparations, and it’s generally recommended to store these in the refrigerator and consume them within a few weeks.
- Trace Moisture: Even trace amounts of moisture left in the food or introduced into the oil can lead to spoilage.
- Best Practice: For longer-term storage without refrigeration, using oil is often best combined with another preservation method first, like drying. For example, oil-packed sun-dried tomatoes are already dehydrated.
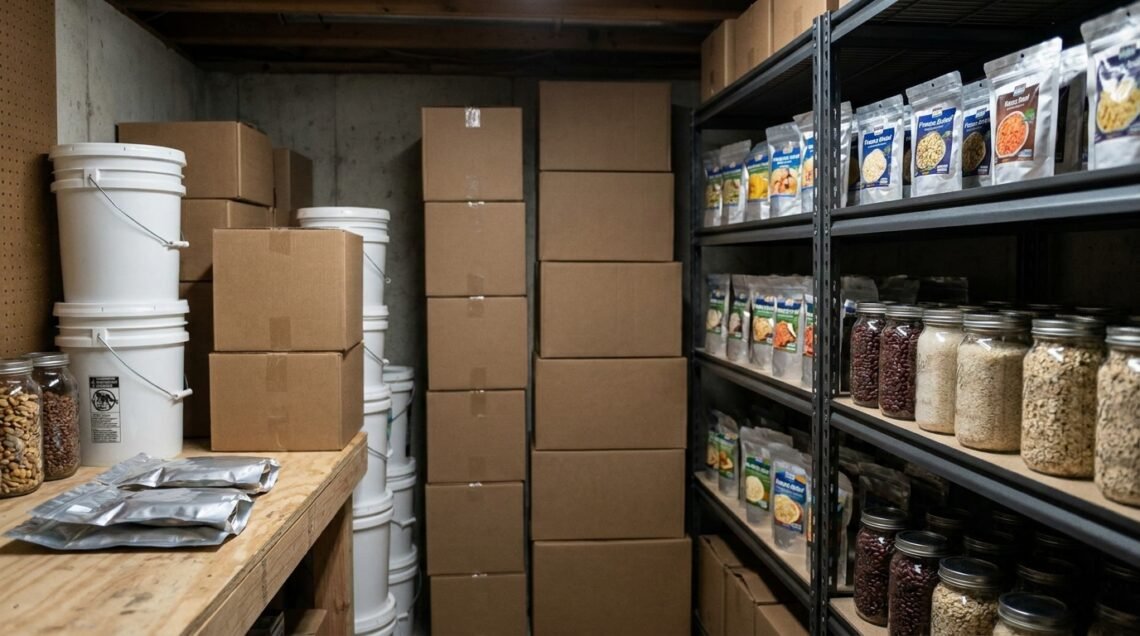
By understanding these different methods, you can build a repertoire of techniques to keep your food safe and edible for extended periods without relying on electricity. It’s about embracing time-tested strategies and adapting them to your needs.
FAQs
1. What are some common methods for storing food long-term without refrigeration?
Some common methods for storing food long-term without refrigeration include canning, dehydrating, fermenting, and using root cellars or cool, dark storage areas.
2. What types of foods can be stored long-term without refrigeration?
Foods that can be stored long-term without refrigeration include dried grains, beans, nuts, seeds, canned fruits and vegetables, fermented foods, and root vegetables like potatoes and carrots.
3. How can I properly store canned foods for long-term use?
To properly store canned foods for long-term use, it’s important to check the seals for any signs of bulging or leakage, store them in a cool, dark place, and rotate your stock to ensure that older cans are used first.
4. What are some tips for dehydrating food for long-term storage?
When dehydrating food for long-term storage, it’s important to slice the food evenly, use a dehydrator or oven set to a low temperature, and store the dried food in airtight containers in a cool, dark place.
5. Are there any foods that should not be stored long-term without refrigeration?
Some foods, such as dairy products, meats, and certain fruits and vegetables, are not suitable for long-term storage without refrigeration due to the risk of spoilage and foodborne illness.